Showing posts with label Dessert. Show all posts

Tuesday, February 8, 2011

Work in Progress

The January 2011 Daring Bakers’ challenge was hosted by Astheroshe of the blog accro. She chose to challenge everyone to make a Biscuit Joconde Imprime to wrap around an Entremets dessert.


I wish it was otherwise, but unfortunately this turned out a disaster for me. When I saw the challenge initially, I had fabulous plans for a whole range of beautiful little jocondes, filled with an array of ice creams, mousses, creams and fruit. Of course, as I normally do, I dawdled too long, and didn't have any time left to do half of what I planned. Then a heat wave struck Melbourne, and it was so stinking hot, I couldn't turn on the oven. The problem is my oven. Apart from being super tiny, it's thermostat dial has fictional numbers on it. I have a separate thermometer inside, but usually it takes me at least an hour's fiddling with the stupid knob to get the temperature where I want it to be. And in this heat, having a hot oven blasting for hours on end wasn't an option.


Cute little flower and dots

At the same time I had a sneaking suspicion that the challenge might not turn out the way I want it to. I've read other people's versions, and if they were having trouble, I knew I definitely would. And I was really reluctant to give up one of my Saturdays for something that might not even work. (The Fabulous Man takes our Little Girl out for the day so I can at least have a shower in peace).  But I did it anyway. And maybe I brought it on myself, but I was right. It was a disaster. Not the joconde bit, mind you. That turned out almost as good as I wanted. It was the inside bit. I decided to make life easy for myself and just make a simple chocolate mousse. The recipe I chose was Nigella's from Domestic Goddess. You know the one which is actually a cake, but she says if you want a mousse chill it instead of bake it? Unfortunately this did not work our for me at all. It was one big mess. It didn't set very well, and when I unmoulded my joconde, it all collapsed in one big sorry-looking puddle. It didn't even taste nice. Horrible gooey texture, tasting suspiciously like raw cake batter. I'll try the joconde recipe again soon and try to make it right, because it looks fabulous. This is not over.


Batter poured over design

Then I looked at the date yesterday, and realised that my blog is one year old! I felt I had to postpone my post about my disastrous jocone, and make something nice for the anniversary. Something nice, and something that cannot possibly fail. You see, for some reason, I have had a lot of mishaps in the kitchen recently. I'm not entirely sure what's happening, but I have obviously lost my cooking mojo. Not that I've ever been great, contrary to my lovely little nephew's opinion. His mum told me that he thought I should definitely enter Masterchef, and would it be okay if they give me my welcome home party when I leave the competition? But then added that it probably won't be necessary, because I will obviously win the competition. Don't you just love the ignorance of kids? I recently saw one of the Junior Masterchef episodes, and I'm telling you, there are 8 year olds who can cook me under the table.


Fresh from the oven

So, considering the fact that these days I do well if I make Nutella toast without burning the toast, I decided to stick with my Daring Bakers disaster for my anniversary post. Because I think this is the best example of my cooking at the moment. I have lofty ideals and grand plans, but  they seldom work out. Mostly I buy my food at the supermarket and cook something super easy for dinner. But, hopefully, I will get better, and the disasters will get less and less. It's a work in progress.


Finished Joconde


Patterned Joconde-Décor Paste

This amount of paste is a lot, so I suggest you make half the amount, at most.

 200g unsalted butter, softened
 200g Confectioners' (icing) sugar
7 large egg whites - about 200g
220g cake flour
Food coloring gel, paste or liquid


COCOA Décor Paste Variation: Reduce cake flour to 170g. Add 60 g cocoa powder. Sift the flour and cocoa powder together before adding to creamed mixture.

Cream butter and sugar until light and fluffy (use stand mixer with blade, hand held mixer, or by hand)

Gradually add egg whites. Beat continuously.


Fold in sifted flour.

Tint batter with coloring to desired color, if not making cocoa variation.

Spread a thin even layer of décor paste approximately 5 mm thick onto silicone baking mat with a spatula, or flat knife. Place mat on an upside down baking sheet. The upside down sheet makes spreading easier with no lip from the pan. (I wasn't sure that it was completely necessary to turn the sheet upside down)

Pattern the décor paste – Here is where you can be creative. Make horizontal /vertical lines (you can use a knife, spatula, cake/pastry comb). Squiggles with your fingers, zig zags, wood grains. Be creative whatever you have at home to make a design can be used. OR use a piping bag. Pipe letters, or polka dots, or a piped design. If you do not have a piping bag. Fill a ziplock bag and snip off corner for a homemade version of one.

Slide the baking sheet with paste into the freezer. Freeze hard. Approx 15 minutes.


Joconde Sponge


85g almond flour/meal - *You can also use hazelnut flour, just omit the butter
75g confectioners' (icing) sugar
 25g cake flour
3 large eggs - about 150g
3 large egg whites - about  90g
10g white granulated sugar or superfine (caster) sugar
30g unsalted butter, melted

In a clean mixing bowl whip the egg whites and white granulated sugar to firm, glossy peeks. Reserve in a separate clean bowl to use later.

Sift almond flour, confectioner’s sugar, cake flour. (This can be done into your dirty egg white bowl)

On medium speed, add the eggs a little at a time. Mix well after each addition. Mix until smooth and light. (If using a stand mixer use blade attachment. If hand held a whisk attachment is fine, or by hand. )

Fold in one third reserved whipped egg whites to almond mixture to lighten the batter. Fold in remaining whipped egg whites. Do not over mix.

Fold in melted butter.

Remove the decor paste from freezer. Quickly pour the Joconde batter over the design. Spread evenly to completely cover the pattern of the Décor paste.

Bake at 475ºF /250ºC until the joconde bounces back when slightly pressed, approx. 15 minutes. You can bake it as is on the upside down pan. Yes, it is a very quick bake, so watch carefully. (I baked mine for 7 monutes at 230ºC)

Cool. Do not leave too long, or you will have difficulty removing it from mat.

Flip cooled cake on to a powdered sugared parchment paper. Remove silpat. Cake should be right side up, and pattern showing! (The powdered sugar helps the cake from sticking when cutting.)

Line the sides and base of your lined mould, and fill with your chosen filling.


Sunday, January 9, 2011

Molly's Chocolate Cake

Jeanne from Cookisister posted the loveliest poem on her blog the other day. Please go there and read it quickly. Are you back? Isn't it lovely? We all know that feeling of suddently catching sight of yourself in an unexpected moment. Unfortunately the last time it happened to me was not that great. I saw a picture of myself taken at Christmas, and I was absolutely shocked about the amount of weight I've put on. I blame the fact that we don't have a full-lenghth mirror in our new house. Of course I noticed my jeans not fitting quite as well as they should, but I haven't actually realised how fat I look. Must be all those Christmas Cookies I made and sampled. And ate. So I did what any reasonable person in my situation would do - I made a chocolate cake and ate half of it before it was even properly cooled down.

But it was so worth it. It was after all the recipe from the lovely Molly Wizenberg from the lovely Orangette, whose book A Homemade Life was the January choice for the lovely book club I'm lucky enough to be part of. (I agree, enough with the "lovely"s, but that's what this cake does to you, I swear). What a great book. I enjoyed absolutely every letter of it. Every chapter, every story, every recipe. Orangette is one of the blogs I read from the first post for three days straight until the last when I found it. Her blog has so much character and warmth, and this book only added depth and more background. I loved reading about her childhood, her time in Paris, her memories of her dad, and getting to know the lovely Brandon a little better.


And oh, the recipes. How lovely are the recipes. My favourite thing about a new book these days  is deciding what to cook after reading it. Usually I make up my mind pretty early on. Not with A Homemade Life. Everything sounded so delicious, I changed my mind every few pages. Banana bread with chocolate and crystallized ginger. No, coeurs a la creme with raspberry puree. No, chocolate cupcakes. No, Hooser Pie. Anyway, halfway through the book I realised I'll just have to start from the beginning and work my way through to the end.

Then the book fell into the bath. I love reading in the bath late at night (multifunctioning, you see), and in an unguarded moment the book fell into the water. It was soaked. And, I'm sorry to say, this is not the first book it happened to. You'd think I'd learn my lesson, but no. Still reading in the bath. So I had to race through the last few (wet) pages before it dried out and became impossible to read. I left it open at the last recipe when I finished, just in case I couldn't open the book again without tearing the pages. And the recipe happened to be this one for chocolate cake.

Now, taking the risk of sounding cras, I just want to say that this cake is bloody awesome. Actually, cake is a term applied pretty loosely here. I'm not sure that any recipe calling for a huge amount of chocolate, ditto for the butter, eggs, lots of sugar, and a single tablespoon of flour could technically be called a cake. Not that I mind. "Chocolate" and "too rich" are not words I ever use in the same sentence. I couldn't wait for this cake to come out of the oven. The smell was pure chocolate - dark and rich and smokey. And the sight of all that gooey, wobbly chocolate was more than I could take. Like I mentioned before, it was halfway gone soon after coming out of the pan. This was actually intended for dinner that night with my family-in-law, and I can't tell you how relieved I was when there was only one other taker. So much more for me. In fact, I had to force myself to take a picture of at least the last slice so that I have something to show you, before eating it straight from the plate with my fingers. Sorry about that.


So, the diet starts tomorrow. I'm thinking I'll have to stop sampling recipes from this book at least until I've lost a few centimetres, because I'm absolutely sure they'll all turn out this lovely. Just like the blog and it's author.

Molly's Chocolate Cake
Serves 1, or around 8 if you're more restrained than I am

200g bittersweet chocolate, chopped
200g unsalted butter, cubed
1 cup plus 2 tablespoons granualted sugar
5 large eggs
1 tablespoon all-purpose flour
Whipped cream, to serve (I never got round to this, but I'm sure it's delicious)

Preheat the oven to 180 degrees Celsius, and butter a 20cm round cake tin. Line the botton of the pan with baking paper, and butter the paper too.

Slowly heat the chocolate and butter in a bowl over simmering water until melted, stirring until smooth. Add the sugar and stir well to incorporate. Set the batter aside to cool for 5 minutes.

Add the eggs one at a time, beating well after each one. Add the flour and stir well until incorporated. The mixture will be dark and sily (yes, indeed, it will)

Pour the batter into the prepared cake tin, and bake for about 25 minutes. The top will be lightly cracked, but edges puffed, and the centre of the cake will look set, but wobble ever so slightly when you jiggle the pan.

Let the cake cool in the tin for 15 minutes, then turn it out onto a serving plate. (you will need two plates to flip it over on).

Supposedly this cake is even better after frozen, and the lovely miss Molly suggests you freeze it for at least 24 hours, then defrost before serving. If you have the self-discipline to do this, you're a better man than I am. It's pretty bloody good straight away. And then about half and hour later. And then 2 hours later for dessert. And the last bit the next morning for breakfast. Try not to make it when there's other people in the house - they might just want a piece.

Saturday, November 27, 2010

Daring Bakers: Simple Chocolate Tart

I don't know about you guys, but to me, the sight of a patisserie with shelves full of fruit tarts is enough to make me swoon with pleasure, and want to jump on the first plane to Europe. Crisp tart shell, sweet pastry cream and fruit arranged beautifully on top. This month, thanks to the Daring Bakers, I learnt what the Italian  term is for this: Crostata di frutta fresca. How cool is that? Doesn't it make you want to say it over and over again? Preferably while eating some of said crostata? Also, sweet short crust pastry is called pasta frolla. I don't think I'll say short crust pastry ever again, when I can say pasta frolla.

Easy to make too. Tart shell, pastry cream, or even some sweetened mascarpone, topped with beautiful fruit. Except I've never actually made one. And I'll tell you immediately why not: it's the blind baking bit. I once made a chocolate pecan tart which required blind baking. It turned out absolutely delicious, except it was so fiddly I wasn't keen to repeat the experience anytime soon.


Then I came across somebody called Jamie Oliver. Baby Brother and I were in Amsterdam, taking a break from drinking coffee and looking at Van Gogh, and found ourselves in an english bookstore. The title caught my eye: The Naked Chef. I'm sorry to say I couldn't take the book off the shelf quickly enough. After the initial disappointment of not seeing any beautiful naked men, I realised that the recipes are actually pretty good, and I bought the book. Back home I realised the man is actually world famous, his recipes are great, and I started cooking. One recipe I've always wanted to try, but somehow never got around to, was his Simple Chocolate Tart. Chocolate, pastry, cream. Say no more. And to make things better, he believes that if you put your pastry in the freezer before baking, you don't have to do the whole baking paper-and-beans-thing. I was sold. And when this Daring Bakers challenge came around, I decided to make, among others, this chocolate tart. I also wanted to do the whole mascarpone cream and beautiful fruit tart, as well as a cooked pastry cream one featured in the challenge. Then I sort of lost track of time, and this morning realised with a shock that posting date is today. Hence, I present you Simple Chocolate Tart. And nothing else. Hopefully I'll get round to them sometime soon.


The 2010 November Daring Bakers’ challenge was hosted by Simona of briciole. She chose to challenge Daring Bakers’ to make pasta frolla for a crostata. She used her own experience as a source, as well as information from Pellegrino Artusi’s Science in the Kitchen and the Art of Eating Well.


Pasta frolla

1/2 c. minus 1 tablespoon [105 ml, 100 g, 3 ½ oz] superfine sugar, or a scant 3/4 cup [180ml, 90g, 3 oz] of powdered sugar
1 and 3/4 cup [420 ml, 235 g, 8 1/4 oz.] unbleached all-purpose flour
a pinch of salt
1 stick [8 tablespoons / 4 oz. / 115 g] cold unsalted butter, cut into small pieces
grated zest of half a lemon
1 large egg and 1 large egg yolk, lightly beaten in a small bowl
Whisk together sugar, flour and salt in a bowl.

Rub or cut the butter into the flour until the mixture has the consistency of coarse crumbs. You can do this in the bowl or on your work surface, using your fingertips or an implement of choice.

Make a well in the center of the mounded flour and butter mixture and pour the beaten eggs into it (reserve about a teaspoon of the egg mixture for glazing purposes later on – place in the refrigerator, covered, until ready to use).

Add the lemon zest to your flour/butter/egg mixture.

Use a fork to incorporate the liquid into the solid ingredients, and then use your fingertips.

Knead lightly just until the dough comes together into a ball.

Shape the dough into a flat disk and wrap in plastic wrap. Place the dough in the refrigerator and chill for at least two hours. You can refrigerate the dough overnight.

Line your tart tin with the chilled dough, making sure it is as even as possible. Wrap the tin in plastic, then put in the freezer for at least an hour.

Bake the tart shell straight from the freezer at 180°C for 15 minutes. Cool.

Simple Chocolate Tart

1 tart shell, baked blind
300ml  double cream
2 tablespoons caster sugar
115g softened butter
450g dark chocolate, broken up
100ml milk
cocoa powder for dusting

Place the double cream and sugar in a pan and bring to the boil. As soon as the mixture has boiled, remove from the heat and add the butter and chocolate. Stir until it has completely melted. Allow the mixture to cool slightly, stirring in the cold milk until smooth and shiny. Scrape all the mixture into the cooked and cooled pastry shell with a spatula. Shake tart to even it out, and allow to cool for around 1-2 hours until room temperature. Dust with cocoa powder. Ultimately the pastry should be short and crisp and the filling should be smooth and should cut like butter.


Sunday, August 29, 2010

Brown Butter and Coffee Baked Alaska

The August 2010 Daring Bakers’ challenge was hosted by Elissa of 17 and Baking. For the first time, The Daring Bakers partnered with Sugar High Fridays for a co-event and Elissa was the gracious hostess of both. Using the theme of beurre noisette, or browned butter, Elissa chose to challenge Daring Bakers to make a pound cake to be used in either a Baked Alasa or in Ice Cream Petit Fours. The sources for Elissa’s challenge were Gourmet magazine and David Lebovitz’s “The Perfect Scoop”.

I remember making Baked Alaska when I was little. I can't remember much about it, except that the recipe I used always made too little meringue (this was before I realised that you just double a recipe if you don't have enough). Years went by, and this challenge was the first I thought about this recipe again. Cake, ice cream and meringue. Can't go wrong, can you? Plus I don't need much of an excuse to make ice cream these days, after my roaring success with the chocolate ice cream with chocolate covered pecans.

I also remember once making brown butter biscuits. For some reason I was not impressed. A lot of trouble with not much of a result. I'm not sure what I did wrong. Probably I didn't heat the butter long enough (I usually err on the side of safety when it comes to possibly burning something). This time I did better. In fact, it was so good, I wonder if shouldn't just use brown butter whenever I need butter in a recipe from now on. Brown butter chocolate chip cookies, anyone?

For the ice cream, I initially thought about making a maple syrup flavoured one, but realised I didn't have enough after making some dessert the other night, which I'll tell you all about later. It happens to me a lot these days. I look for inspiration to use up an ingredient, then find so many good things I want to try that I end up having to buy more of the stuff. Like maple syrup. Watch this space.


Anyway, looking for inspiration in this wonderful book, I came across coffee meringue, and remembered a recipe I bookmarked ages ago. Vietnamese Coffee ice cream, recipe from The Master courtesy of Cafe Fernando. Except I forgot to add coffee to the meringue in the end, so this version has only plain meringue. Not that it was a problem. This ice cream is so bloody fabulous, I cannot urge you enough to get up, get in your car, buy some condensed milk and good coffee if you don't have any, and make this ice cream as soon as you can. It is that good. And easy. No fuffing about trying to make a custard with a one year old hanging onto your legs.

Also, this recipe had no problem with too little meringue. In fact, there was so much left over, I made some extra. Coffee (to make up for the previous forgetfulness), rose petal and vanilla. They were delicious, as meringues tend to be. Don't you just love leftovers?

Thus, revisiting a childhood memory, I bring you Brown Butter and Coffee Baked Alaska. A lot better than I remember. (Honestly, don't bother with the meringue. Just make the ice cream.)


David's Vietnamese Coffee Ice Cream

Recipe from David Lebovitz
1 tin (400g) sweetened condensed milk
1 1/2 cup water
1/2 cup ( 1.3 oz or 40 g) + 1 tbsp dark roast ground coffee, divided
1/3 cup whole milk

1.Brew a very strong coffee with 1+1/2 cup of water and 1/2 cup of ground coffee. With a paper filter, that will yield 1 cup of very strongly brewed coffee. You can substitute with a cup of strongly brewed espresso.

2.Whisk together the condensed milk, espresso, milk and ground coffee. Chill the mixture thoroughly, then freeze it in your ice cream machine according to the manufacturer’s instructions.

Brown Butter Pound Cake

275g unsalted butter
2 cups (200g) sifted cake flour
1 teaspoon (5g) baking powder
1/2 teaspoon (3g) salt
1/2 cup (110g) packed light brown sugar
1/3 (75g) cup granulated sugar
4 large eggs
1/2 teaspoon pure vanilla extract

1. Preheat the oven to 325°F/160°C and put a rack in the center. Butter and flour a 9”x9” (23cmx23cm) square pan. (I used a round cake tin)

2. Place the butter in a 10” (25cm) skillet over medium heat. Brown the butter until the milk solids are a dark chocolate brown and the butter smells nutty. (Don’t take your eyes off the butter in case it burns.) Pour into a shallow bowl and chill in the freezer until just congealed, 15-30 minutes.

3. Whisk together cake flour, baking powder, and salt.

4. Beat the brown butter, light brown sugar, and granulated sugar in an electric mixer until light and fluffy, about 2 minutes. Beat in the eggs one at a time, mixing well, and then the vanilla extract.

5. Stir in the flour mixture at low speed until just combined.

6. Scrape the batter into the greased and floured 9”x9” (23cmx23cm) square pan. Smooth the top with a rubber spatula and rap the pan on the counter. Bake until golden brown on top and when a toothpick inserted into the center comes out clean, about 25 minutes.

7. Cool in the pan 10 minutes. Run a knife along the edge and invert right-side-up onto a cooling rack to cool completely.
 
Meringue

8 large egg whites
½ teaspoon (3g) cream of tartar
½ teaspoon (3g) salt
1 cup (220g) sugar

Beat the egg whites, cream of tartar, and salt on high speed in an electric mixer until soft peaks form. Beat in the sugar gradually in a slow stream until stiff peaks form.

Assembly Instructions
 
1. Line four 4” (10cm) diameter tea cups with plastic wrap, so that plastic wrap covers all the sides and hangs over the edge. Fill to the top with ice cream. Cover the top with the overhanging plastic wrap and freeze for several hours, or until solid.

2. Level the top of the brown butter pound cake with a serrated knife or with a cake leveler. Cut out four 4” (10cm) diameter circles from the cake. Discard the scraps or use for another purpose.

3. Make the meringue (see above.)

4. Unwrap the ice cream “cups” and invert on top of a cake round. Trim any extra cake if necessary.

5. Pipe the meringue over the ice cream and cake, or smooth it over with a spatula, so that none of the ice cream or cake is exposed. Freeze for one hour or up to a day.

6. Burn the tips of the meringue with a cooking blow torch. Or, bake the meringue-topped Baked Alaska on a rimmed baking sheet in a 500°F/260°C oven for 5 minutes until lightly golden. Serve immediately.

Saturday, August 14, 2010

Daring Cooks: Butterscotch Banana Pierogi

The August 2010 Daring Cooks’ Challenge was hosted by LizG of Bits n’ Bites and Anula of Anula’s Kitchen. They chose to challenge Daring Cooks to make pierogi from scratch and an optional challenge to provide one filling that best represents their locale.

In my case, that means I should have pierogi with either kangaroo, vegemite, or boerewors (South African farmer's sausage). As you can see, I came up with butterscotch bananas. I decided "my locale" also loosely translates into "my kitchen", and what I have in my kitchen at the moment is overripe bananas. Sounds perfect with some butter, brown sugar and dark rum, doesn't it? Except, I didn't have any rum, so I used some butterscotch schnapps instead. (I realise it's unforgivable to have butterscotch schnapps in your house, but it's leftover from the time I tried to recreate the butter beer from Harry Potter. Which turned out delicious, thank you very much.)


I'm going to be completely honest with you, ladies and gentlemen. I am exhausted. The Fabulous Man has been away on business most of the week, and I'm worn out from looking after the Little Girl on my lonesome. To all you single mums out there: Respect, girlfriends. I don't know how you do it. It's a combination of the Little Girl refusing to miss out on anything, and being a bit out of sorts because she's missing Daddy. Just taking a shower is a challenge, since she realised that she can crawl in while I'm washing my hair and can't see or hear her. She's done it once (soaked through clothes put on only minutes before), and now she tries to do it every time. I dare you to try and wash your hair with one hand while keeping the shower door closed with the other, as the Little Girl bangs on it with all her might.


Falling asleep has always been a battle, but that's now combined with waking up way too often during the night for a one year old. Anyway, all this to explain that I'm tired, I'm not going to write fabulous posts tonights. Luckily this challenge was a fairly easy one, otherwise I would've missed out.

So without further ado, I bring you Butterscotch Banana Pierogi.


Butterscotch Banana Pierogi
Serves 4

Dough


½ cup (125 ml) milk (can be whole milk, 2% or skim milk)
½ cup (125 ml) whipping cream
3 large egg whites
1 tsp (5 ml) salt
3 cups (450 gm) all-purpose flour

1. Mix flour and salt, add other ingredients, and knead dough until you have a smooth dough.

2. On a floured surface roll out fairly thin (1/8” or about 3 millimeters), cut into 2” (5 cm) squares, and fill with 1 tsp (5ml) banana filling (see below).


Filling
2 bananas, chopped
2 tablespoons butter
2 tablespoons dark brown sugar
1 tablespoon butterscotch schnapps or rum (optional)

In a heavy saucepan, melt the butter and brown sugar until frothy.
Add the bananas, and fry until soft and fragrant.
Add the schnapps.

Keep separate until needed.

To finish

Fry the cooked pierogi in the leftover caramel until nice and golden, and serve with some cream and some schnapps on the side if you're letting your hair down.

Tuesday, April 27, 2010

Daring Bakers: A Tasting Platter of Steamed Puddings


The April 2010 Daring Bakers’ challenge was hosted by Esther of The Lilac Kitchen. She challenged everyone to make a traditional British pudding using, if possible, a very traditional British ingredient: suet.


Oooh, I love pudding! For ages I wondered what to make. The beauty of the steamed pudding (like ice cream), is that it's a blank canvas for whatever your heart desires, and the variations are endless. In the end I couldn't decide, so I thought I'll make a few. I initially wanted to make both the sponge pudding and the crust pudding, but decided that I'm not going to make life difficult for myself (more than I already am by deciding to make four different puddings). The Little Girl is cutting her teeth at the moment, and not sleeping that well, so I thought it's best to get in and out of the kitchen as quickly as possible. You never know when she might wake up and want some mummy time. Luckily this is one of those forgiving desserts. Abandoning it at any stage for an unforseen time is perfectly okay, and if it steams for a few minutes more, that's perfectly okay as well. My kind of recipe. As it turned out, the Little Girl is still sleeping soundly, even after making, photographing and eating the puddings, and now writing about them.


The four puddings I made were: White Chocolate and Raspberry, Dark Chocolate and Pear, Pistachio and Rose Petal and Pecan Nut, Treacle and Bourbon pudding. I loved all of them. The Fabulous Man loved all of them. But our favourite favourite was the raspberry one. I've always loved the combination of tart raspberry and sweet white chocolate, and this time around I wan't disappointed either.


I found that the 6 to 8 tablespoons of milk in the original recipe wasn't near enough. I ended up using about 12, and after dividing the batter into 4, I added some more milk to two of the batches. These two ended up a bit spongier (is that a word?), so next time I'll do the same. Alway go with your instinct.


I'm really glad with how well this all turned out. Steamed pudding isn't something I would've considered making before this, so thanks to the Daring Bakers for pushing me out of my comfort zone. Can't wait to see what's next.


Steamed Pudding Four Ways

100g flour
1/4 teaspoon salt
1 1/2 teaspoon baking powder
100g breadcrumbs
75g caster sugar
75g suet
1 large egg
10 tablespoons cold milk

1 tablespoon dried rose petals
4 drops rosewater
2 tablespoons chopped pistachio nuts

1 tablespoon cocao
4 tinned baby pears

1/3 cup pecan nuts, toasted
2 teaspoons treacle
1 teaspoon bourbon

1/2 cup frozen raspberries
20g chopped white chocolate

30g chopped white chocolate
3 tablespoons cream

30g dark chocolate
3 tablespoons cream

2 tablespoons rose petal syrup (or make your own by heating 2 tablespoons water, 2 tablespoons caster sugar, 2 ml rose water and a drop of pink food colouring together in a saucepan over low heat until the sugar has melted)
extra rose petals for garnish
  • Butter 4 ramekins, tea cups or pudding dishes thoroughly. Keep aside.
  • Sift flour, salt and baking powder into a bowl. Add breadcrumbs, suet and sugar. Mix to a soft batter with beaten egg and milk. If the batter isn't soft enough, add more milk until you're happy with the consistency.
  • Divide the batter into 4.

For the chocolate and baby pear pudding:
Mix the cocao into one quarter of the batter. Place the baby pears into the bottom of the dish, and cover with the chocolate batter.

For the raspberry and white chocolate pudding:
Place the frozen raspberries into the bottom of the dish. Fold the chopped white chocolate into another quarter of the batter, and spoon over the raspberries.

For the pistachio and rose petal pudding:
Place the chopped pistachios in the botton of the dish. Fold the rose petals through another quarter of the batter, and spoon over the nuts.

For the treacle pecan nut pudding:
Spoon the treacle into the bottom of the ramekin dish. Pack the pecan nut halves to form a single layer on the treacle. Mix the bourbon into the leftover batter, and spoon over the pecan nuts.

Cover the ramekins securely with greaseproof paper and string, and steam for 1 hour.

Turn the puddings out onto a big  tasting platter. Spoon the white chocolate sauce over the raspberry pudding, the chocolate sauce over the chocolate and pear pudding, and the rose petal syrup over the pistachio and rose petal pudding. There should be enough treacle over the pecan nut pudding to form a sauce.

To make the white chocolate sauce:
Melt the white chocolate and the cream in a heatproof bowl over a saucepan of boiling water until smooth.

To make the dark chocolate sauce:
Melt the dark chocolate and the cream in a heatproof bowl over a saucepan of boiling water until smooth.

Friday, April 9, 2010

Chocolate and Custard Torte

Good morning dear readers. Today I have a question: How do you measure the success of your recipes? Does it need to be cheap and easy? Better than the mother-in-law's? Contain chocolate? I'm really strict when it comes to my own, and have a long list of boxes to tick before considering a recipe worthy of being remembered and remade.

First of all I have to like the sound of it. Either it has to have a great name, like Chocolate Insanity, or Hot Cross Bunnies, or Puddle cookies, or the name must tell me that this sounds interesting, like Salmon with Strawberry and Feta crust. Then the dish has to look good. By this I don't mean styled and dressed to death. I'm always slightly suspicious of dishes that has a hundred and one different garnishes, with a serviette folded into a swan on the side. Then again, plenty of dishes don't score high in the looks area, but taste divine, like stew, or chocolate tart, for that matter. Looks can bring you far, but is nothing without substance. A little bit like in real life.

It helps if a dish is made of fairly cheap and readily available ingredients, preferably already in the pantry, and doesn't take all day, but again this isn't essential. I'm very happy to spend time and money on something if I know it will be worth the effort.

And of course, it goes without saying, it has to taste fabulous. I'm happy to settle for delicious if it's dead easy and cheap and to be served on a Tuesday, but really, I prefer my dishes to be swoon worthy. Life's too short, as they say, to eat mediocre food. And both I and my guests must rate it this highly. I remember a fig ice cream I made for a dinner one night (I'll post the recipe one day): Everybody started off with their two scoops, but soon I had to bring out the leftovers, and at the end of the evening one of my guests was licking the bowl! Now that's what I call a success.


Which brings me to this post's recipe. I searched for a dish to use up stale hot cross buns, and found this chocolate and custard tart on taste.com.au. It was a bit different than your usual bread and butter puddings (which is delicious, don't get me wrong): you make a base of thinly sliced hot cross buns and melted chocolate (also a good way to use up easter eggs), cover it with a creamy custard and set it in the fridge. Sounds great, doesn't it? The reviews were mostly raving about it, so I decided to make it for a family gathering last night.

Everybody said it was delicious, and liked the idea of the hot cross bun crust, but I couldn't shake the feeling that they were just being nice. How do I know? Nobody, not a single one, had seconds, and there were plenty left. Now in my book, that's a failure. Admittedly, there are a few things I'd do differently next time, like sprinkling some liqueur over the buns, and have more of a custard filling that's not quite so creamy, maybe baked. Maybe chocolate. But will there be a next time? Do I really want to spend time on a recipe that's already let me down once?  I'm not sure. What do you think, dear readers?


Chocolate and Custard Torte
Serves 8


70g (1/3 cup) caster sugar
1 teaspoon (5ml) vanilla extract
600ml thickened cream
4 egg yolks
200g good-quality dark chocolate (or leftover Easter eggs), coarsely chopped
100ml thin cream
4 bought hot cross buns, thinly sliced vertically
2 tablespoons warm water
2 1/2 teaspoons gelatine powder
2 teaspoons cocoa powder

Place the sugar, vanilla extract and half the thickened cream in a small saucepan over low heat. Cook, stirring, for 2-3 minutes or until the sugar dissolves. Bring to a gentle boil. Pour into a heatproof jug.
Place the egg yolks in a medium bowl. Gradually whisk in the cream mixture. Return to the saucepan over low heat and cook, stirring, for 4 minutes or until the custard coats the back of a spoon. Transfer to a heatproof bowl. Place in the fridge for 1 hour to chill.

Meanwhile, combine the chocolate and thin cream in a heatproof bowl over a saucepan half-filled with simmering water (make sure the bowl doesn't touch the water). Use a metal spoon to stir until the chocolate melts and the mixture is smooth.

Line the base and sides of a round 24cm (base measurement) springform pan with non-stick baking paper. Arrange half the hot cross bun slices, in a single layer, over the base of the pan. Spread half the chocolate mixture evenly over the base to cover completely. Repeat with the remaining hot cross bun and chocolate mixture. Cover with plastic wrap and place in the fridge for 1 hour or until set.

Whisk the remaining thickened cream in a bowl until soft peaks form. Use a large metal spoon to gently fold the cream into the custard mixture.

Place the warm water in a small heatproof jug. Sprinkle with gelatine and whisk with a fork until the gelatine dissolves. Gently fold the gelatine mixture into the custard mixture. Pour over the chocolate base. Cover and place in fridge for 3 hours or overnight to set. Dust with the cocoa powder to serve.

Saturday, April 3, 2010

Caramelised Bocconcini with Strawberries


I don't think it's necessary to look pretty in life, but sometimes it helps. Dessert is the same. The main meal is done, the wine is finished. Any dessert at all is a bonus. In my house you will be served coffee definitely, dessert maybe. Pretty dessert? Unlikely.

And yet, sometimes a pretty dessert is called for.  It may be the boss that's over for dinner, or some loved one you want to make something special for. Either way, this dessert is pretty, unexpected, and, most importantly, easy. And very impressive.

So, next time when the boss is over for dinner, or you're cooking for somebody important on the third date, remember this one.

Caramelised Bocconcini with Strawberries
Serves 4

1 punnet strawberries
150g sugar
300g bocconcini
basil or other herb to serve

Wash, hull and half the strawberries. Taste them, and sprinkle with a little bit ofcaster sugar if they're not that sweet.

Melt the sugar in a heavy bottomed saucepan until caramelised. Be careful not to burn it.

When ready, put the bocconcini in the saucepan and cover with the caramel. Let it harden on some baking paper.

Combine the strawberries, bocconcini and basil in bowls.

Serve and impress.


Saturday, March 27, 2010

Pears in Coffee

Dearest readers. Remember me? The girl who promised dozens and dozens of yummy South African recipes? Yup, that's me. Only all the catching up and sleeping in and showing the Little Girl off to all the family sort of got in the way of all the cooking. But I have all the recipes packed and will work my way through them once we're back home, promise.

In the meantime I want to tell you a bit more about my Baby Brother, who I haven't seen for more than a year and missed very much. I briefly mentioned before that he is a coffee roaster, but that's not half of the story. This is what happened. Both my parents were lawyers, and Baby Brother decided to follow in their footsteps. However, after studying like mad for years and qualifying, he decided he'd rather be a filmmaker. As you do.

I was on holiday in the South Island of New Zealand when I got a call from him at four in the morning (time differences not something he appreciated fully at the time). After establishing that there is no major drama, we started talking about his future. He found a wonderful private film school in Wellington which he was dying to attend, and asked me if I'll be able to support him if he did. Of course I said yes (isn't that what big sisters are for?), and we shared a house in Wellington for almost a year.

 Baby Brother (left), Director

We had a fabulous time. His homework was to watch as many movies as possible, so we frequented the cinemas alarmingly often. In that time he made a few films himself, and I was (and still am) tremendously proud of him. After  graduation he worked on a few film sets, but when his visa ran out, he unfortunately had to come home. He needed a steady job to have his visa extended, and that's not something you find in the film industry.

Back home in South Africa work in the film industry is rather thin on the ground, and he started to look around for something else. Enter the Tribeca Coffee Company, a speciality roastery of fine coffee blends, who needed a master coffee roaster. Typical of the optimism of youth, Baby Brother decided a deep love of coffee must be all that's needed, applied, and got the job. And that's what he does now. He works quite hard, but he has an encyclopedic knowledge of coffee and coffee roasting, and, my favourite, he smells of coffee every night he comes home.

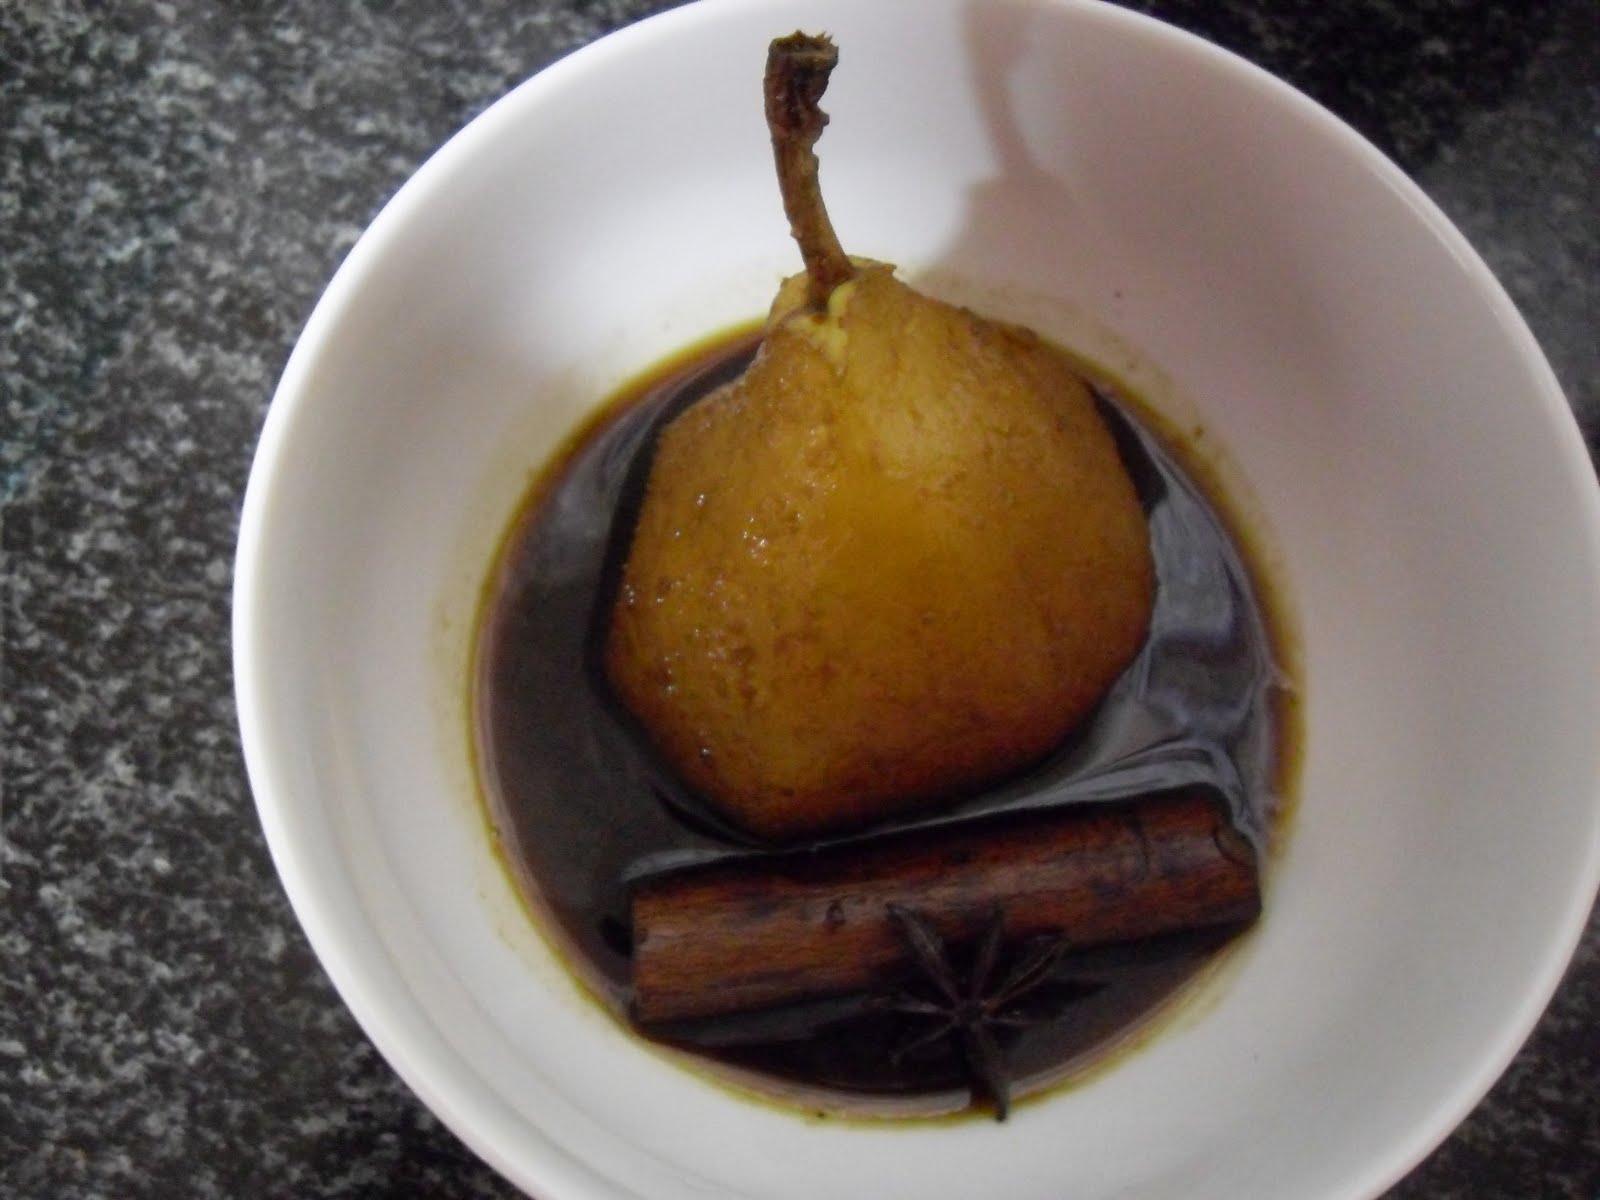
So, in honour of Baby Brother, I give you Pears in Coffee. We all know and love Pears in Wine, Pears in a Spicy Syrup, and Pears in Champagne. But Pears in Coffee will knock your socks off, I promise. The pears are poached in the coffee, and then the coffee is reduced to a syrup with the most intense coffee flavour. It is absolutely delicious. And if you want your house to smell like caramelised coffee for a couple of days, do what I did the first time I tried to make this last week and forget about the coffee on the stove. The syrup will burn to a thick paste that sticks to the bottom of the saucepan, but the smell is divine. Or just do it right the first time, and have the most delicious dessert without having to throw out the saucepan. And don't forget the cream.


Pears in Coffee
Enough for 6

6 pears, peeled and cored
1 litre freshly made coffee
6 tablespoons sugar, or to taste
1 cinnamon stick
2 star anise

Place the pears in a saucepan that is big enough to fit the pears snugly. Combine the coffee, sugar and spices, and pour over the pears.

Simmer the pears over medium heat until soft, but still firm.

Remove the pears and keep separate. Turn the heat up and boil the coffee until reduced to a syrup.

Serve the pears with the syrup and some cream.

Friday, March 12, 2010

The Happiest News

Dearest readers. I'm in a very good mood and I'll tell you why. It's my friends, you see. The ones who are responsible for me being married to the Fabulous Man. The ones who at their wedding had the good sense to put me at the same table as said Fabulous Man. And who also (somehow) arranged for Mcnaught's comet to fill the entire sky that night, to make me feel that surely this was a sign of good things to come.

They are expecting a baby, which is fabulous news. Not at all surprising. These two are so wonderful, I knew some little soul would claim them as parents sooner rather than later. I've been waiting for them to make some sort of announcement for months now. And what do you know? This morning I gave the Lovely Steve (that's his real name, of course) a call, and he said the magic words: "We have news." And I was filled with happiness.


So, to celebrate, and congratulate, I decided to make a cake. My immediate thought was chocolate, as you do, but then realised that Sarah will be watching her caffeine intake. Mind you, as they are in New Zealand, and therefore cruelly denied to ever taste my cake, I realise that the caffeine levels in my cake is entirely beside the point. Still, in case the Lovely Steve decides to make his own version (and he is the best cook in the world, which I'll tell you about some time), I searched for something else.

In the pantry I had some almond meal left over from my tagine, and also a whole bag of lemons from our friend Nick's garden. Nick was also at the fateful wedding, so I thought it only fitting to look for a recipe combining the two. I consulted our friend Google, who suggested the lemon and almond polenta cake on Nigella's website. Now I have a motto in life, and it is that if it's good enough for Nigella, then it's good enough for me. That woman should be queen, I tell you. Not only will commonwealth envelopes feature uber sexy stamps, probably smelling of chocolate, more Australians might vote in favour of keeping the country a monarchy.

Of course the cake tasted fabulous. Not too sweet, very lemony, and a lovely texture thanks to the polenta. I only had the instant type, and it worked perfectly. If you have the patience to wait for the cake to cool completely in the tin, you're a better man than I am (figuratively speaking, of course). I couldn't wait, the smell was driving me crazy. And it was delicious, but very crumbly. You do really need to cut this cake fridge cold. After that you can serve it as as, but I also tried it at room temperature and slightly warm, both very good. You decide which you prefer.


A note to all Australian readers: this recipe is from the UK, therefore a tablespoon is 15ml, not 20ml. If anybody can tell me why Australia is different in this regard, I'd really like to know. Google wasn't sure.

Lemon, almond and polenta cake
Recipe from here


200g butter
200g caster sugar
200g ground almonds
100g polenta
3 eggs
4 lemons
1 teaspoon (5ml) baking powder
6 extra tablespoons (15ml) caster sugar


Preheat your oven to 170°C. Grease and line a 23cm springform pan.

In a bowl beat the butter and sugar until light and fluffy. Add in the eggs one by one, beating well after each addition.

Add the ground almonds and again beat well. Stir in the polenta and the baking powder. Grate in the zest of one of the lemons and the juice of half a lemon. Mix well and then scrape the mixture into your prepared tin.

Bake on the middle shelf of the oven for about 45 minutes to an hour - check to make sure a skewer comes out clean when inserted into the cake.

While the cake is baking, place the zest of two of the lemons and the juice from the remaining three and a half lemons in a small saucepan with the 6 tablespoons of sugar. Stir to combine and then heat over a gentle heat until the sugar has dissolved.

When the cake is cooked, remove from the oven and prick all over with a skewer - immediately pour the lemon syrup over the cake and let it soak in completely.

Leave to cool in the tin, then remove and wrap in foil until needed. This cake keeps well in the fridge for a few days, but I double dare you to try and keep it that long.

Enjoy with some cream if you have some calories to spare, but keep in mind that a slice of this cake actually counts as a serving of fruit (lemons, and let's not forget the vitamin C) and a serving of calcium. It will be irresponsible not to add the cream.

Saturday, February 27, 2010

BloggerAid Culinary Olympics: Australia


When I was little my mum bought me a picture book of the world. Two pictures in this book impressed my young mind tremendously, and changed forever the course of my future. The first one was a picture of the Sydney opera house. I thought  this was the most beautiful building I've ever seen, and it remains my favourite even today. The other picture was of black swans. I couldn't believe my eyes. Black Australian swans! It boggles the mind! I decided there and then that one day I will live in this country of fabulous buildings and black swans.

Fast forward a few years, and here I am. It may have taken a few years, some other countries en route, and my original choice of Sydney as home town changed suddenly to Melbourne when I met the Fabulous Man, but living here is every bit as exciting as I dreamed of when I was little. The people are friendly, the animals are strange (some of them even taste nice), and the landscape is like a dream. Towering eucalyptus trees, forests filled with ferns and moss, snowy mountains, red desert earth, beautiful sandy beaches.


My other favourite Australian thing is how movie and television quotes become part of the language. "Tell him he's dreamin'", and "What do you call this, darl? Cheakin", from The Castle. "Not happy, Jan", from the Yellow Pages ad, and my ultimate favourite, from Kath and Kim: "No man has ever been shot by his wife while doing the vacuuming."

And then there's the food. At first glance you will see meat pies, Vegemite, snags (sausage, named after the elements tin and silver, which were used as preservatives in the olden days), pavlova and, of course, the barbie (Aussie for barbeque). But then you look again. And you see that Australia is also the birthplace of foodie heavyweights like Donna Hay, Bill Granger and Neil Perry, among many great others. Australia is also home to immigrants from all over the world. Nearly 1 in 4 Australians are born elsewhere, which contributes to the rich variety of ethnic food found right on your doorstep. Australia truly is a paradise for foodies.


One of my favourite Aussie cakes is Lamingtons, those lovely sponge cakes dipped in chocolate icing and then tossed in coconut. Now I know they aren't originally from Australia. We even have them in South Africa where they're called krimpvarkies (hedgehogs). But that is one of the things I like about Australia, the international feel of it. It doesn't matter where you're from, you will find something familiar about the country. To honour that, I chose to make these Lamingtons from the Australian Women's Weekly's little book called Cupcakes. Doesn't everybody just love Australian Women's Weekly recipe books? Aren't they the ideal ambassadors for the country? Nothing trumps food when it comes to bringing people together, no matter what your background.


Hopefully these cupcakes will be good little ambassadors as well at the Culinary Games. And if you decide to whip up a batch yourself, enjoy.

Lamington cupcakes with wings
makes about 10

For the cupcakes
90g butter, softened
1/2 teaspoon vanilla extract
1/2 cup (110g) caster sugar
2 eggs
1 cup (150g) self-raising flour
2 tablespoons milk

For the chocolate icing
10g butter
1/3 cup (80ml) milk (I found the icing not runny enough, and added a bit more)
2 cups (320g) icing sugar
1/4 cup (25g) cocoa powder

Finishing touches
1 cup (80g) dessicated coconut
1/4 cup (100g) raspberry jam
1/2 cup (125ml) thickened cream, whipped

Preheat oven to 180°C. Line a standard muffin tin with paper cases.

Beat together all the ingredients for the cupcakes until the mixture lightens. Divide the mixture among the cases and smooth the surfaces of the cupcakes. Bake for about 20 minutes. Turn out on a wire rack until cool.

To make the chocolate icing: Melt the butter in a medium heatproof bowl over a saucepan of simmering water. Stir in the milk and the sifted icing sugar and cocoa powder until the icing is a coating consistency. You may need to add more milk.

To finish: Remove the cupcakes from the paper cases. Dip the cakes in the icing, drain off excess, then toss in the coconut. Place on a wire rack to set. (If you have, say, a Little Girl who is learning to stand up against everything and falls down occasionally, and you need to abandon your lamingtons to administer hugs and kisses, and when you come back the icing has gone all thick and gooey, don't fret, my dears. Just add a little bit of boiling water to make it nice and runny again.)

Cut a cone shape out of the top of the cupcake (see photo), and fill the top with the jam and cream. Cut the bottom off your cupcake cone to make a disc, then cut the disc in half to form wings. Press the wings into the cream and voilà! Lamington cupcakes fit for the Games!


Do you know about the work that BloggerAid Changing the Face of Famine (BACFF) is doing? At the moment they are hosting the H20PE for Haiti online raffle, which has been extended to March 7th. Read my post about it here, head over to Cooksister to see the list of prizes, and then to the JustGiving donations page to buy some tickets. They go for only $10 each, and prizes are shipped internationally. I have donated a wonderful book called South Africa Eats, showcasing South Africa's culinary traditions and cultures, but there are many wonderful prizes on offer.


Another way to support BACFF is to buy the BloggerAid Cookbook where 100% of the proceeds target children and education through the World Food Programme called School Meals. Purchases can be made here.

I'm always amazed about how something as little as $10 can make a big difference in somebody's life. If you feel inspired to help, please do, otherwise please support your own charities. Every little bit helps.

Tuesday, February 23, 2010

Lovely sounding watermelon muffins with white chocolate, rosewater and lemon zest

I had high hopes for these muffins. We had some watermelon left in the fridge which needed using up, and what do I find paging through the new Good Food? Watermelon and white chocolate chip muffins. Doesn't that sound lovely? I love recipes using what you have in the fridge, and turn out to be fabulous too. So out came the flour and my cute new babuschka measuring cups, and I started baking.


Of course I had to make them special. I had some Green and Blacks white chocolate in the pantry which I thought I'll use. When I opened the packet I saw the chocolate flecked with tiny pieces of black, and lo and behold, another look at the packet revealed that the chocolate contained Madagascar vanilla. This was so beautiful, I thought long and hard about not putting it in at all, and saving it for something a bit more special than muffins, like sharing with the Fabulous Man. But as I had no other chocolate, and the watermelon was starting to look at me reproachfully from the fridge, I started chopping.


I also added some lemon zest and rosewater for a romantic twist, and it looked wonderful, the pink dough studded with little black-speckled pieces of white chocolate, and some swirls of lemon in between.

To top it all off, I used my ultra gorgeous cupcake liners. Aren't these just the the prettiest little things you've ever seen?


Into the oven they went, and I rubbed my hands in gleeful anticipation. Boy, was I disappointed. Out came muffins that can only be described as a very synthetic looking orange, and my heart broke. Where were the pretty pink rose-scented muffins I pictured having with my afternoon cup of Earl Grey?


Then there was the taste. Do you know what watermelon muffins taste like? Nothing. It was just this bland piece of dough, apart from the absolutely wonderful pockets of melted white chocolate and vanilla (defenitely using these again!).

I turned to my trusted old friend when things go wrong, the internet. Turns out that the recipes that contained real watermelon were very much like the one I used, and not getting rave reviews either. Most recipes ask for watermelon flavouring to be added, or are just pink coloured muffins with raisins or dark chocolate chips to resemble seeds.


I'll give you the recipe I used anyway, in case you have more success than I had. If anybody has a recipe they know and love, please pass it on. In the meantime I'll have my watermelon as nature intended: straight from the fridge, infused with some vodka (once the Little Girl has grown up a bit).

Watermelon and white chocolate muffins
Makes 12

400g watermelon, peeled and chopped
5ml rosewater or to taste
1 1/2 cup (225g) self-raising flour
2 tbsp caster sugar
1 tsp baking powder
50g butter, melted
1 egg, lightly beaten
zest of one lemon
3/4 cup white chocolate chips
icing sugar, to dust

Preheat the oven to 180°C. Line a 12-hole muffin pan with paper cases.

Place watermelon in a blender and puree until smooth. Strain into a jug, discarding any seeds and pulp. Flavour with rose water.

Sift flour, sugar and baking powder into a bowl. Add melted butter, egg, watermelon juice and lemon zest, and stir until just combined. Fold through the chocolate.

Spoon into paper cases, and bake for 20-25 min until done. Transfer to wire rack to cool.

Tuesday, February 16, 2010

The Best Chocolate Sauce in the World. And some pears to have with it.

Now I know I'm not the first person to claim to have the recipe for The Best Chocolate Sauce in the World. According to our good friend Google, around 1,760,000 other people claim the exact same thing. Except mine really is the best. I promise. Let me introduce you.

This recipe is from one of my favourite South African foodie magazines, Food & Home Entertaining. I love this magazine with all my heart and all my tummy. I carried boxes of them with me while moving around in South Africa, and almost cried when I was forced to tear out my favourite recipes to lighten the load when I finally moved to Australia. This is the first recipe I looked for and saved.


I first made the pears that go with this sauce while living in Oudtshoorn, the ostrich capital of South Africa. If you google Oudtshoorn, you'll find that the town is famous for a few things:
  • ostriches
  • KKNK
  • Cango caves
  • Jemima's
  • semi-desert climate very unsympathetic towards growing your own fruit and vegetables
It's this last point that forced me to cook out of the supermarket for the few months I lived there. Which is fine if you're happy with your run-of-the-mill everyday food. Not so much if you have boxes of Food & Home to work through. The only exception was pears. For some reason there always seemed to be good pears available, and, as they say, if you can't beat them, join them. I started collecting pear recipes.


I have quite a few good ones, but this one is by far the best. First you make a fabulous cardamom crumble. (And cardamom happens to be my ultimate favourite spice). Then you poach the pears in an orange and spice syrup. Then you caramelise the pears in butter and more sugar. Then you have the pears with the chocolate sauce and crumble. And then you feel like you've died and gone to heaven.


It's the sauce, you see. The pears are delicious, and the crumble is fabulous. Oh, but the sauce. It's the sauce that lifts this recipe into the sublime, all rich and smooth and dark with chocolate. It's the sauce that you end up eating straight from the fridge, mixed with some of the crumble. And that's when you realise this is truly The Best Chocolate Sauce in the World. And then you have just a tiny bit more.


Poached and caramelised crumbly pears
Serves 6

For the crumble

4 cardamom pods
50g oats
50g flour
50g butter, room temperature
50g treacle sugar
50g walnuts, chopped

For the pears

6 firm pears
juice of 1 lemon
150g caramel sugar (I used demerara)
400ml orange juice
100ml sherry or dessert wine
1 stick cinnamon
3 cardamom pods, whole

For the caramel

30ml butter
30ml caramel sugar
60ml of the poaching liquid

Preheat the oven to 180°C
Using a pestle and mortar, crush the cardamom pods and remove the seeds. Discard the pods and grind the seeds. Add this together with the oats to the flour.
Rub the butter into the flour mixture until it looks like coarse breadcrumbs. Add the sugar and walnuts and rub it into the mixture until it becomes lumpy. If you want a finer crumb, combine everything in a food processor.
Sprinkle the mixture onto a baking tray and bake, turning occasionally, until crunchy and golden, about 15 minutes.
Remove from the oven and let cool before use.

Peel the pears, leaving the stalks intact. Brush them with some lemon juice to prevent discoloration.
In a large, heavy-based saucepan, dissolve the sugar in the orange juice and sherry. Add the remaining lemon juice, and the cinnamon stick and whole cardamom pods. Bring slowly to the boil.
Reduce the heat and allow to sauce to simmer for at least 2 minutes to develop the flavours before adding the pears. Poach the pears for about 15-20 minutes, until tender but still firm. Remove from the poaching liquid.

To caramelise the pears, melt the butter in a large, heavy-based saucepan until bubbly. Add the pears and fry for about 5 minutes. Add the caramel sugar and continue turning the pears until they are coated and golden brown in colour. Spoon over some of the poaching liquid, and continue turning until the pears are fully covered in the rich. glossy caramel syrup.

Serve sprinkled with crumble and The Best Chocolate Sauce in the World

The Best Chocolate Sauce in the World

100ml cream
100ml milk
75g treacle sugar
30g butter
50g golden syrup
200g dark chocolate, chopped

Place the cream, milk, sugar, butter and surp in a heavy-based saucepan. Heat gently until the sugar has dissolved, then bring to the boil, stirring occasionally for about 3 minutes.
Remove from the heat and stir in the chocolate.
Continue to stir until all the chocolate has melted.

Enjoy responsibly.

Sunday, February 14, 2010

Chocolate Pizza Pockets

This lady is one of the main reasons I started my own blog. Not only does Meeta have beautiful photo's and delicious recipes, she also hosts the very popular Monthly Mingle. I used to look at the round-ups longing to join in the fun, and am so excited that I can now venture into the world of food blogging events myself. And I couldn't have picked a nicer theme to take the plunge: Bread and Chocolate, hosted by Jamie from Life's a Feast. Wow! The very thought makes my mouth water. And that was even before I'd started having a look around the net for inspiration!


You'd think it an easy choice to make. I love bread. I love chocolate. Combine the two and you have heaven on your plate. Forget the carbs, forget the fat, think about all those anti-oxidants and serotonin, and realise that this is health food. Nay, medicine! You will be downright irresponsible if you don't have bread and chocolate at least once a day! Seriously, I'm all for being healthy and mindful of what you eat, but I do think a big part of that is having whatever your body tells you it needs, have it in moderation, and enjoy eating it. All this guilt about the food we eat cannot possibly be good for our health!

Anyway, back to recipes. My, oh my, what a selection. Chocolate on bread with a sprinkle of sea salt, chocolate bread and butter pudding in any conceivable variation, chocolate chip bread, good old Nutella on toast, and chocolate hot cross buns, (yes, I know it's only February, but why we restrict ourselves to these fabulous buns only at Easter is beyond me). Where to start?

After lots of hmming and aahming, I decided to go back to my current philosophy, which is to love my money. I know it sounds strange, but I'm reckoning that if you love your money, you will only exchange it for something really really worthwhile, which in my case means I don't go to the shops all the time and spend it on crap. It also means only one grocery trip a week, based on a carefully planned menu, and some lateral thinking when it comes to using what you have first. And what I try to have around these days is either a batch of my favourite new pizza dough, or the ingredients to whip some up. I love this pizza dough - it can be used for so much more than just pizza, (which is great by itself, let's face it), and I am working on few ideas which I'll tell you all about later.

What I also have in my cupboard at all times is some good chocolate. Green & Black's to be exact. Please allow me to digress for a minute. I have a wonderful, lovely girlfriend who lives in Johannesburg, called Anelle. Not only is she smart and funny and generally great company, she is also the best giver of gifts I know. She always has something to give, and it's always chosen with care and fabulous taste. One of the gifts I've received from her was a block of this wonderful chocolate, and I've been eating it ever since. (Not that particular block, mind you, that was gone in a matter of minutes). The dark chocolate is rich and smooth, the milk chocolate is not too sweet, and the white chocolate has vanilla in it! Hence, always a special place in my cupboard for this trio.


I wanted to do something different than just your average chocolate pizza, and decided to make little pizza pockets, one half of the batch filled with a spicy dark chocolate and hazelnut mix (thank you Cooksister for the great idea!), and the other half with white chocolate and macadamia nuts.


I started off with little pockets more or less the size of ravioli, but there wasn't enough filling to stand up to the amount of dough. For the next round I cut rounds of about 10cm diameter, placed the filling on one side, then folded them over and squeezed the edges together. This worked much better. I also added a little splash of cream to the white chocolate mix, as it was a tad dry with only the chocolate and the nuts. Next time I will use some white chocolate spread instead of the cream for a nice smooth filling, and I will also add some cardamom for some extra oomph.

These little chocolate pockets turned out really delicious, and I'm really proud of them. I hope you like them too if you decide to make them, or use them as inspiration for your own recipe.


And of course, I hope your Valentine's day is full of love, friendship, and some chocolate.

Chocolate Pizza Pockets

One quantity of my pizza dough, or use your own favourite recipe

For the white chocolate filling

about 1/2 cup of white chocolate spread
100g white chocolate, chopped
50g macadamia nuts
1/2 teaspoon ground cardamom

For the dark chocolate filling

100g dark chocolate, chopped
about 1/2 cup of Nutella
50g hazelnuts, chopped
1/2 teaspoon ground cinnamon
1/2 teaspoon ground chilli (if your tastebuds agree)


Preheat oven to 200°C/400°F

Roll out your pizza dough as thin as you can. Cut out circles of around 10cm diameter.

For the white chocolate pockets: place a dollop of white chocolate spread towards one side of the circle, top with some white chocolate, macadamia nuts and a pinch of cardamom. Fold over the other half of the dough and pinch edges closed.

For the dark chocolate pockets: place a dollop of Nutella towards one side of the circle, top with dark chocolate, hazelnuts, a pinch of cinnamon and a pinch of chilli. Fold over the other half of the dough and pinch the edges closed.

Brush the tops of the pockets with some egg for some colour.

Bake for 12-15 minutes until golden brown.