Saturday, February 27, 2010

BloggerAid Culinary Olympics: Australia


When I was little my mum bought me a picture book of the world. Two pictures in this book impressed my young mind tremendously, and changed forever the course of my future. The first one was a picture of the Sydney opera house. I thought  this was the most beautiful building I've ever seen, and it remains my favourite even today. The other picture was of black swans. I couldn't believe my eyes. Black Australian swans! It boggles the mind! I decided there and then that one day I will live in this country of fabulous buildings and black swans.

Fast forward a few years, and here I am. It may have taken a few years, some other countries en route, and my original choice of Sydney as home town changed suddenly to Melbourne when I met the Fabulous Man, but living here is every bit as exciting as I dreamed of when I was little. The people are friendly, the animals are strange (some of them even taste nice), and the landscape is like a dream. Towering eucalyptus trees, forests filled with ferns and moss, snowy mountains, red desert earth, beautiful sandy beaches.


My other favourite Australian thing is how movie and television quotes become part of the language. "Tell him he's dreamin'", and "What do you call this, darl? Cheakin", from The Castle. "Not happy, Jan", from the Yellow Pages ad, and my ultimate favourite, from Kath and Kim: "No man has ever been shot by his wife while doing the vacuuming."

And then there's the food. At first glance you will see meat pies, Vegemite, snags (sausage, named after the elements tin and silver, which were used as preservatives in the olden days), pavlova and, of course, the barbie (Aussie for barbeque). But then you look again. And you see that Australia is also the birthplace of foodie heavyweights like Donna Hay, Bill Granger and Neil Perry, among many great others. Australia is also home to immigrants from all over the world. Nearly 1 in 4 Australians are born elsewhere, which contributes to the rich variety of ethnic food found right on your doorstep. Australia truly is a paradise for foodies.


One of my favourite Aussie cakes is Lamingtons, those lovely sponge cakes dipped in chocolate icing and then tossed in coconut. Now I know they aren't originally from Australia. We even have them in South Africa where they're called krimpvarkies (hedgehogs). But that is one of the things I like about Australia, the international feel of it. It doesn't matter where you're from, you will find something familiar about the country. To honour that, I chose to make these Lamingtons from the Australian Women's Weekly's little book called Cupcakes. Doesn't everybody just love Australian Women's Weekly recipe books? Aren't they the ideal ambassadors for the country? Nothing trumps food when it comes to bringing people together, no matter what your background.


Hopefully these cupcakes will be good little ambassadors as well at the Culinary Games. And if you decide to whip up a batch yourself, enjoy.

Lamington cupcakes with wings
makes about 10

For the cupcakes
90g butter, softened
1/2 teaspoon vanilla extract
1/2 cup (110g) caster sugar
2 eggs
1 cup (150g) self-raising flour
2 tablespoons milk

For the chocolate icing
10g butter
1/3 cup (80ml) milk (I found the icing not runny enough, and added a bit more)
2 cups (320g) icing sugar
1/4 cup (25g) cocoa powder

Finishing touches
1 cup (80g) dessicated coconut
1/4 cup (100g) raspberry jam
1/2 cup (125ml) thickened cream, whipped

Preheat oven to 180°C. Line a standard muffin tin with paper cases.

Beat together all the ingredients for the cupcakes until the mixture lightens. Divide the mixture among the cases and smooth the surfaces of the cupcakes. Bake for about 20 minutes. Turn out on a wire rack until cool.

To make the chocolate icing: Melt the butter in a medium heatproof bowl over a saucepan of simmering water. Stir in the milk and the sifted icing sugar and cocoa powder until the icing is a coating consistency. You may need to add more milk.

To finish: Remove the cupcakes from the paper cases. Dip the cakes in the icing, drain off excess, then toss in the coconut. Place on a wire rack to set. (If you have, say, a Little Girl who is learning to stand up against everything and falls down occasionally, and you need to abandon your lamingtons to administer hugs and kisses, and when you come back the icing has gone all thick and gooey, don't fret, my dears. Just add a little bit of boiling water to make it nice and runny again.)

Cut a cone shape out of the top of the cupcake (see photo), and fill the top with the jam and cream. Cut the bottom off your cupcake cone to make a disc, then cut the disc in half to form wings. Press the wings into the cream and voilĂ ! Lamington cupcakes fit for the Games!


Do you know about the work that BloggerAid Changing the Face of Famine (BACFF) is doing? At the moment they are hosting the H20PE for Haiti online raffle, which has been extended to March 7th. Read my post about it here, head over to Cooksister to see the list of prizes, and then to the JustGiving donations page to buy some tickets. They go for only $10 each, and prizes are shipped internationally. I have donated a wonderful book called South Africa Eats, showcasing South Africa's culinary traditions and cultures, but there are many wonderful prizes on offer.


Another way to support BACFF is to buy the BloggerAid Cookbook where 100% of the proceeds target children and education through the World Food Programme called School Meals. Purchases can be made here.

I'm always amazed about how something as little as $10 can make a big difference in somebody's life. If you feel inspired to help, please do, otherwise please support your own charities. Every little bit helps.

Friday, February 26, 2010

BloggerAid Culinary Olympics: South Africa

The Fabulous Man and I were sitting on the couch a couple of nights ago watching the Olympics, and he said: "I bet if we start practicing now, we can go to the Winter Olympics in 4 years. Let's take up curling." Now, I don't wish to offend anybody, but I agree that that sport looks way too easy. Fun, but easy. So we started to make plans, mainly looking around Google to see if anybody in Australia (or South Africa) actually plays the sport, because how good will it be to win a gold medal in anything really, especially curling.


Then I came across something much more up my alley: the BloggerAid Culinary Olympics. And I realised that the sport I am best at is Food. I'm good at it. I'm good at reading recipes, I'm good at looking at foodie blogs, I'm good at shopping for ingredients. When it comes to the cooking bit I'm probably more at a thank-you-for-participating level rather than medal-winning ability, but the eating part is right back at gold. I'm especially good at eating.

The best part is, I get to represent two countries, my native South Africa, and my adoptive Australia. People always ask me which country I prefer, but honestly, it's like asking if I prefer chocolate or sandwiches. Both are perfectly nice in their own way, and I don't think it should be necessary to chose, do you?


So, first into the arena: South Africa. My mother country is a melting pot of cultures and traditions, and you will find anything from high tea with scones and clotted cream to a fiery Indian curry. Our vibrant Cape Malay culture provides fabulous dishes like bobotie, which is curried meat with bread and fruit, with a savoury custard topping. Another favourite among South Africans is the braai, or barbeque, done over coals from wood. Charcoal if you have no other choice, but never gas. Never ever. At a braai you'll find all kinds of meat, including a variety of game. If you're lucky there will be some boerewors, or farmer's sausage, which is beef sausage flavoured with some spices, and sosaties, marinated meat on skewers made mostly with lamb, but also beef, chicken and game.

But the one food that is uncompromisingly South African, and which all South Africans crave when in another country, is biltong. In my first post I told you a bit about this fabulous food, and promised a recipe. And I think this is the perfect platform to showcase a recipe with biltong as its star. Mostly we eat biltong as is, usually while watching the cricket, maybe washed down with a beer. You can also have it on sandwiches or in a salad. I have even seen biltong sushi, and pizza with a biltong topping.


For the olympics I wanted to try something new, and decided on a biltong ravioli. I made a biltong and ricotta filling, and dressed the ravioli in a sage butter sauce. And people, dear people, this was absolutely as delicious as it sounds. I couldn't get enough of this, and happily had the leftovers for breakfast the next morning. Even the Fabulous Man, who doesn't really like biltong, said it's the best dish I've made so far. High praise indeed. I hope the judges like it too.

If you don't have access to biltong, you can substitute it with prosciutto. Don't be tempted to up the amount of biltong. It doesn't look like much, but remember that a little goes a long way. I chopped the biltong very finely, but I also think it will work if you process the biltong and the ricotta together to get a finer texture. I don't have a pasta roller, so I bought some excellent ready made pasta. Please feel free to use your own favourite pasta recipe if you want to do it yourself.


Biltong and ricotta ravioli with sage butter
Serves 4

500g ricotta
150g biltong, finely chopped (or substitute prosciutto)
2 large egg yolks
freshly fround pepper

500g fresh pasta

115g butter
small handful sage leaves

freshly shaved parmesan and biltong

Mix the ricotta, biltong, egg yolks and pepper together in a bowl. Don't use salt, as the biltong is already quite salty.

Cut out your desired shapes from the pasta (I used squares, but circles are good too). Place a spoonful of filling in the centre of your shape, and paint the edges with some water. This step is important as it prevents the filling from leaking out. Either cover your filling with another shape, or fold your existing shape over the filling. Press the edges together, making sure you press out a much of the air as possible.
You can make the ravioli in advance up to this step. Place the ravioli pieces on a baking sheet and put it in the fridge.

Cook the ravioli in boiling water until done, about 5 minutes.

While cooking the ravioli, melt the butter in a saucepan until golden and frothy. Toss in sage leaves, cook for another 2 minutes.

Toss the cooked ravioli in the sage butter, and top with shaved parmesan and biltong.

Enjoy!


Do you know about the work that BloggerAid Changing the Face of Famine (BACFF) is doing? At the moment they are hosting the H20PE for Haiti online raffle, which has been extended to March 7th. Read my post about it here, head over to Cooksister to see the list of prizes, and then to the JustGiving donations page to buy some tickets. They go for only $10 each, and prizes are shipped internationally. I have donated a wonderful book called South Africa Eats, showcasing South Africa's culinary traditions and cultures, but there are many wonderful prizes on offer.

Another way to support BACFF is to buy the BloggerAid Cookbook where 100% of the proceeds target children and education through the World Food Programme called School Meals. Purchases can be made here.

I'm always amazed about how something as little as $10 can make a big difference in somebody's life. If you feel inspired to help, please do, otherwise please support your own charities. Every little bit helps.

Wednesday, February 24, 2010

Chocolate, banana and blue cheese dumplings with pistachio dust, and a delicious 2003 Skillogalee Shiraz

Do you know what is one of my favourite things about growing up? Apart from having chocolate for breakfast whenever you feel like it, drinking wine with dinner and going to bed past midnight on a schoolnight? It's getting to know your family as people, and not just as uncle/cousin/brother etc.  When you're looking forward to seeing them not because they have a trampoline, but because you actually enjoy their company.

I'm blessed with a wonderful family, and two of the people whose company I particularly enjoy are my uncle Charles and aunt Marietta. They lived in Cape Town for a while, and I stayed with them when I attended a course there. Every night we had some great food, sampled some of Charles's wine collection (Marietta isn't much of a wine drinker, so my uncle was happy to have somebody to share his wine with), and chatted late into each night. Those two exhausted me, and every morning was hard work paying attention in class. I loved it.

On a subsequent visit, I suggested a visit to Waterford estate in Stellenbosch, which had a chocolate and wine tasting on offer (for those of you visiting Cape Town, maybe during the World Cup, may I suggest this beautiful place?). I could see Charles wasn't too impressed with this silliness, but drove us there anyway, in his very elegant Mercedes, over dirt roads. I was getting more worried by the minute about my choice of activity, and offered to pay for the whole day in case it turned out to be a diaster. It didn't, it was fabulous, and Marietta told me afterwards that Charles couldn't stop speaking about how much he enjoyed it.


The successful marriage of wine and chocolate appealed to me, and I often have my chocolate with a glass of wine for added fabulousness. And how wonderful was it to see that the new Sugar High Friday/Wine blogging Wednesday challenge theme was Tender Twosomes, pairing dessert with your choice of tipple.

I pulled out a recipe I've been wanting to try for ages, these chocolate, banana and blue cheese dumplings. I once saw a program on the Discovery channel about food science, which said that blue cheese and chocolate is a good match, as they have similiar molecular structures (or something), and I've been on the lookout for recipes using the happy couple ever since. I found this recipe in a copy of Taste, the most beautiful South African foodie magazine on offer, licked my lips and tore out the recipe (it was my mother's copy. Sorry mum.)


And it was everything I expected and more. Each bite greets you with lovely sweet banana in a  bittersweet chocolate embrace, topped with surprising little pockets of rich saltiness in between. I don't think I would have been able to place the flavour as blue cheese necessarily, but the threesome of flavours complemented each other perfectly (or is this taking the metaphor too far?).

The wine suggestion that came with the recipe was a sauvignon blanc, in particular a South African Jordan Blanc Fume 2006, but I unforunately didn't have any, being in another country and all that. Also, I wanted a shiraz anyway, so off to the wine shop I went. And what caught my eye was a 2003 Skillogalee. The words "basket pressed" and a silver medal sticker clinched the deal, and even the price was friendly at just over $30 for the bottle. I almost had Skillogalee before. The Fabulous Man always has quite a few bottles of wine in his collection, and generally they're for drinking, except this one bottle he always forbid me to use, as he was saving it "for a special occasion". I was happily awaiting this special day. You know what it turned out to be? A weekend visit with friends WHEN I WAS PREGNANT and couldn't have any!!! I was not impressed, and the poor man was forced to find another bottle to save for when I'm in a drinking way again.


As I'm still responsible for the majority of the Little Girl's food, I could only have a couple of sips of the shiraz with the dessert. I want to say it was delicious, but I know that's not good winespeak, so the Fabulous Man contributed the following: a full-bodied wine, rich and smooth, with hints of black pepper and cherry. I wasn't sure if this will satisfy the wine buffs, so I did some research.

This shiraz won silver medals 2004 Royal Melbourne Wine Show and the 2005 Royal Hobart Wine Show, and bronze medals at the 2005 Royal Queensland- and Royal Adelaide Wine Shows. It is described as "powerful, rich, concentrated blackberry, bitter chocolate and spice, with good oak and tannins." Like I said: delicious.

I can't wait to make this for dessert again. A good substitute for the banana, in case you're not a fan, will be poached pear, and I will definitely try that at some stage. I also found my tablespoon size dumplings a tad to large, and will make them smaller next time. If you want to try this recipe, a word of warning: when you fry these little treasures, some of the chocolate melts into the oil, colouring the oil and hence the dumplings a dark brown, and it starts to burn very soon. Use a small pan, and be prepared to change the oil often. Otherwise it's perfect as it is, and I hope you'll have the opportunity to make it for a loved one soon.


Chocolate, banana and blue cheese dumplings with pistachio dust
Enough for 6

For the dumplings
1 egg
125ml buttermilk
60g sugar
140g flour
1/2 teaspoon baking powder
3 ripe bananas, thinly sliced
100g dark chocolate, chopped
60g blue cheese, crumbled
oil for frying

For the pistachio dust
50g pistachio nuts
30g icing sugar

To make the dumplings: Beat together the egg, buttermilk and sugar. Mix in the remaining ingredients.
Heat some oil in a small saucepan. Drop teaspoonfuls of the mixture into the oil and fry until golden brown. Change the oil when it becomes too dark. Drain on absorbent paper.

To make the pistachio dust: Grind the nuts and the icing sugar in a small food processor until fine. Sprinkle over the hot dumplings.

Serve with your favourite Shiraz.

Tuesday, February 23, 2010

Lovely sounding watermelon muffins with white chocolate, rosewater and lemon zest

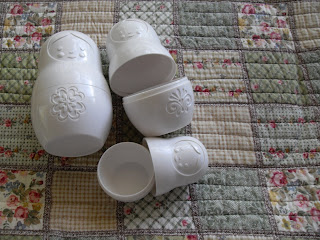
I had high hopes for these muffins. We had some watermelon left in the fridge which needed using up, and what do I find paging through the new Good Food? Watermelon and white chocolate chip muffins. Doesn't that sound lovely? I love recipes using what you have in the fridge, and turn out to be fabulous too. So out came the flour and my cute new babuschka measuring cups, and I started baking.


Of course I had to make them special. I had some Green and Blacks white chocolate in the pantry which I thought I'll use. When I opened the packet I saw the chocolate flecked with tiny pieces of black, and lo and behold, another look at the packet revealed that the chocolate contained Madagascar vanilla. This was so beautiful, I thought long and hard about not putting it in at all, and saving it for something a bit more special than muffins, like sharing with the Fabulous Man. But as I had no other chocolate, and the watermelon was starting to look at me reproachfully from the fridge, I started chopping.


I also added some lemon zest and rosewater for a romantic twist, and it looked wonderful, the pink dough studded with little black-speckled pieces of white chocolate, and some swirls of lemon in between.

To top it all off, I used my ultra gorgeous cupcake liners. Aren't these just the the prettiest little things you've ever seen?


Into the oven they went, and I rubbed my hands in gleeful anticipation. Boy, was I disappointed. Out came muffins that can only be described as a very synthetic looking orange, and my heart broke. Where were the pretty pink rose-scented muffins I pictured having with my afternoon cup of Earl Grey?


Then there was the taste. Do you know what watermelon muffins taste like? Nothing. It was just this bland piece of dough, apart from the absolutely wonderful pockets of melted white chocolate and vanilla (defenitely using these again!).

I turned to my trusted old friend when things go wrong, the internet. Turns out that the recipes that contained real watermelon were very much like the one I used, and not getting rave reviews either. Most recipes ask for watermelon flavouring to be added, or are just pink coloured muffins with raisins or dark chocolate chips to resemble seeds.


I'll give you the recipe I used anyway, in case you have more success than I had. If anybody has a recipe they know and love, please pass it on. In the meantime I'll have my watermelon as nature intended: straight from the fridge, infused with some vodka (once the Little Girl has grown up a bit).

Watermelon and white chocolate muffins
Makes 12

400g watermelon, peeled and chopped
5ml rosewater or to taste
1 1/2 cup (225g) self-raising flour
2 tbsp caster sugar
1 tsp baking powder
50g butter, melted
1 egg, lightly beaten
zest of one lemon
3/4 cup white chocolate chips
icing sugar, to dust

Preheat the oven to 180°C. Line a 12-hole muffin pan with paper cases.

Place watermelon in a blender and puree until smooth. Strain into a jug, discarding any seeds and pulp. Flavour with rose water.

Sift flour, sugar and baking powder into a bowl. Add melted butter, egg, watermelon juice and lemon zest, and stir until just combined. Fold through the chocolate.

Spoon into paper cases, and bake for 20-25 min until done. Transfer to wire rack to cool.

Sunday, February 21, 2010

H20pe for Haiti

Today we're going to be serious, so make yourself a cup of tea and find a comfortable spot. Do you have a little girl or boy? Or a big one? Do you have a soulmate that means the world to you? Mum or dad? Beloved friend? May I suggest you go and hug them now and tell them you love them? Or phone them if they're far away, or write an e-mail. Because life is precious, and we never know when our loved ones might be taken away from us.
Like you, I was shocked watching the reports from the Haiti earthquake. It drove me to tears, and I had to turn off the television many times as I just couldn't take any more heartache. The worst for me was watching the desperate people in the aftermath, fighting to get something to eat and drink for their children. I can just imagine being in the same circumstances, and I tell you, I will also turn violent if necessary to protect my family. In a heartbeat.


Photo from ConcernWorldwide via Flickr

Luckily the dynamic Jeanne from Cooksister did not stand idly by. Together with BloggerAid - Changing the face of famine, she organised an online raffle to raise funds for Concern Worldwide's relief effort in Haiti. This group is a non-governmental international humanitarian organisation working towards the end of extreme poverty worldwide. They have been working in Haiti since 1994, and already had over 100 members on the ground when the earthquake struck. They now have a full scale response in Martissant and St Martin, two of the poorest areas in Port-au-Prince. This involves water distribution, a cash-for-work clean-up campaign, soap distribution, temporary latrines and shelters.

The raffle goes live today, and a list of prizes will be available at Cooksister as well as the BloggerAid website. Tickets cost $10/£6.50/ about 11.15 AUD. All prizes will be shipped worldwide. If you prefer you can make a donation without buying a ticket at H2Ope for Haiti JustGiving donation page. Justgiving will pay all the money raised directly to Concern Worldwide, less their processing fee, and donations can be made via international debit or credit cards as well as Paypal.


Photo from ConcernWorldwide via Flickr


This is a wonderful opportunity to make a small contribution that will make a big difference. b                  zsxxxxxxxxxxxxxxxxxxxxxxxxxs (the Little Girl's contribution to this post). Anyway, where were we. That's right, big difference. Also remember to look after the people close to you. Go phone your mum. That will make a big difference too.

UPDATE: The list of prizes is now available at Cooksister here. All of them look fabulous, I have my eye on a couple. If you want to know a bit more about South African food culture, my prize is a book called South Africa Eats, by Phillipa Cheifitz. Beautiful photographs, delicious stories, enough to make you book your plane ticket for a trip to experience it all for yourself. I hope this book finds a happy home. Please also have a look at the rest of the prizes, bidding on more than one is highly recommended.

Saturday, February 20, 2010

Roasted cinnamon ice cream

The Fabulous Man got me an ice cream maker for Christmas. Actually he only was aware of this after the fact, as he wasn't present when the purchase was made. I'll explain: my husband is one of those fabulous men (hence the name) who says whenever I point at something and say how nice it is, that I should get it. Be honest, isn't that just the nicest thing you've heard all day? Of course I very rarely then go ahead and "get it", but it is such a nice change from all the previous men who tried to tell me how I should spend my money, even when I still earned my own salary in the days Before the Little Girl. That's why, when I saw the Cuisinart (which is what the authority on all things ice cream recommends) in the window, on sale nogal*, I went ahead and got it.


Of course I then had to decide which ice cream to make first, but honestly, it was a no-brainer: Roasted Cinnamon ice cream from Regan Daley's In the Sweet Kitchen. This is the first ice cream I've ever made, and it's still my favourite. I love the contrast of the warm spice with the cold of the ice cream, and, like black heels, it goes with everything. Need something to go with your chocolate pudding? Cinnamon ice cream. Apple pie needs a lift? Check. Have some cardamom crumble left over from your fabulous pears with Best Chocolate Sauce in the World? There you go.


You have to get your timing down to a tee with a Little Girl in the house, and I've been thinking about this recipe for a couple of weeks now. It really showcases cinnamon, as it uses both ground cinnamon which you dry roast to bring out the flavour, as well as cinnamon sticks. I briefly thought about grinding my own cinnamon. You always hear about freshly ground spices being better, but somehow I couldn't remember ever hearing this about cinnamon. After a bit of research I came across this link, which told me this:

"Cinnamon is unusual among spices because freshly ground cinnamon is not always the best choice. Most spices are always better freshly ground because the spices start losing volatile oils and thus flavour as soon as they are ground, the longer they sit after that the more flavour and aroma is lost. Although this also holds true for ground cinnamon, producers generally grind the best cinnamon bark for sale as ground cinnamon and the lower quality cinnamon bark is rolled, dried, and sold as cinnamon sticks. The lower quality of bark used to make most cinnamon stick far outweighs the volatile oil loss of pre-ground cinnamon."

There you go. Every day something new.


I've decided to enter this recipe in the hugely popular Weekend Herb Blogging event, this week hosted by Cinzia from Cindystar. Please have a look at the round-up for all the recipes of this week. If you want to participate next time, the rules are here.

Enjoy your weekend!


Roasted cinnamon ice cream

makes about 4 cups

2 teaspoons ground cinnamon
2 cups half-and-half cream   (I used 1 cup milk and 1 cup light cream I had in the fridge)
1 large cinnamon stick
6 large egg yolks
3/4 cup granulated sugar
1 cup heavy cream**

Toast cinnamon over low heat until warm and fragrant, about 2 -3 minutes.

In a saucepan, combine half-and-half and the cinnamon stick. Bring to just boil over medium high heat. As soon as bubbles break the surface, remove from heat and let infuse for 5 min. (I was forced to abandon my cream at this stage as the Little Girl wasn't happy with only the Fabulous Man's attention anymore. I left it in the fridge overnight and reheated it the next morning, which worked fine)

Lightly whisk egg yolks in a big bowl, then gradually whisk in the sugar. Beat just until it pales and thickens ever so slightly. Whisk in the hot cream, a little at a time.

Rinse out the saucepan but don't dry it. Have ready a fine strainer set over a clean bowl. Return the custard mixture to the pot over medium heat, stirring constantly until it thickens enough to coat the back of a spoon, about 7-10 minutes. Immediately pour the custard through the strainer.

Add 2 tablespoons of heavy cream to the roasted cinnamon. Blend into a thick paste with a rubber spatula. Add another 2 tablespoons of cream, mix. Whisk the paste into the custard until smooth. Stir in the reaming cream, and press a piece of plastic wrap over the custard. Poke a few holes in the plastic to let steam escape, and let it cool in the fridge.

Churn your ice cream in your brand new Cuisinart, or follow David's instructions here to make your ice cream without an ice cream maker.


*Afrikaans expression meaning something like "to top it all"

** Did you notice I said 1 cup cream, not 2? If you did, well done. I didn't. I used 2. I kept on thinking that it looks a tad too creamy, but ignored that inner voice that urged me to check the recipe, as it sounded way too much like my mother. Not that the ice cream was bad. In fact, it was so rich and fabulous, I might repeat the mistake next time.

Thursday, February 18, 2010

Persian lamb in a Tagine

I love gifts. I love looking for the perfect one, wrapping it beautifully, handing it over. I also love getting presents, unwrapping it, oohing and aahing about it, thanking whoever gave it to me. Some people are natural gift givers. I already told you about my friend Anelle. My sister-in-law, Simone, is another.
My family does Kris Kringle for Christmas, a custom I cannot recommend highly enough. Each of the grown-ups pull the name of another grown-up out of a hat (the children aren't deprived). Then we go to our little website, and everybody makes a list of things they would like. There's a $100 limit, which might seem like a lot, but it still beats buying something for everybody. So everybody gets a decent gift they really want. Great, isn't it?


Except I don't play by the rules. My entry on the website says "I like to be surprised". It's the anticipation, the light shaking of the present (you never know if it's fragile),and then finally unwrapping it to reveal what you got. Which unfortunately makes for a slightly more stressful Christmas for whoever has to come up with something to get me. Luckily for me, the last two Christmases it just so happend to be Simone. The first Christmas she gave me a tagine. How fabulous is that? I always wanted one, and was happily surprised when I opened my present. Except by then I was pregnant with the Little Girl, and having a helluva time with morning sickness. In fact, I spent Christmas morning outside on the deck, as I couldn't take the smell of the lamb roasting in the kitchen. I also couldn't eat any of the said lamb, or of the turkey, or of anything else, for that matter, when lunch came. Hence, as glad as I was about getting a tagine for Christmas, there would be no eating anything at all for the next 7 months, tagine or not. It was put away in the cupboard, waiting for hungrier days.


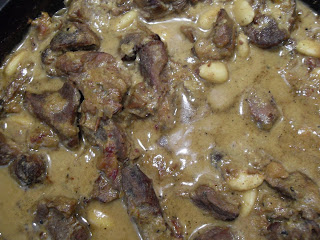
Until last weekend. It was time for the tagine to make it's debut. Now I realise that just because a dish is cooked in a tagine, doesn't mean it is a full-blown bona fide tagine. This one definitely isn't. As I researched some recipes with our friend Google, my mind kept going back to one of the recipes in my secret little recipe book. It's called Persian Lamb, and consists of shoulder of lamb slow cooked with spices and dates, and some yoghurt and ground almonds added towards the end. It's delicious (hence it's inclusion in the little book), and I made the executive decision of adapting it to the tagine. It's basically the same recipe, except I cut up the lamb, tweaked the spices a bit, and cooked it for slightly less than the original 6 hours. We had it with couscous and Moroccon carrot salad. It was even more delicious in it's reincarnated form.


And I can't wait to be surprised again.

Persian lamb in a Tagine
Serves about 6 people

one shoulder of lamb, cut into pieces (David Lebovitz suggests you massage your lamb with salt beforehand and leave it in the fridge. I didn't have time for this, but I might try it next time)
1 medium onion, finely chopped
1 1/2 cup lamb stock
1 teaspoon dried ginger
1 teaspoon tumeric
6 cardamom pods, crushed
2 cinnamon sticks
20 strands of saffron
1 bunch of coriander, rinsed
2 tablespoons ground almonds
1/2 cup whole blanched almonds
2 cups yoghurt
1/2 cup chopped dates

Preheat your oven to 175°C  / 350°F

Heat some oil in your tagine, and brown the lamb in batches. Add the onion, stock and spices, and stir, making sure you scrape the bottom of the tagine to release the nice bits of sticky lamb. Add the bunch of coriander, cover and stick it in the oven.

Cook for 2 to 2 1/2 hours, stirring occasionally. Remove the coriander, add the rest of the ingredients, and cook for a further hour. Uncover the dish if the sauce is too liquid. Taste for seasoning before serving.

Serve with couscous and Moroccan carrot salad.

Enjoy!

Tuesday, February 16, 2010

The Best Chocolate Sauce in the World. And some pears to have with it.

Now I know I'm not the first person to claim to have the recipe for The Best Chocolate Sauce in the World. According to our good friend Google, around 1,760,000 other people claim the exact same thing. Except mine really is the best. I promise. Let me introduce you.

This recipe is from one of my favourite South African foodie magazines, Food & Home Entertaining. I love this magazine with all my heart and all my tummy. I carried boxes of them with me while moving around in South Africa, and almost cried when I was forced to tear out my favourite recipes to lighten the load when I finally moved to Australia. This is the first recipe I looked for and saved.


I first made the pears that go with this sauce while living in Oudtshoorn, the ostrich capital of South Africa. If you google Oudtshoorn, you'll find that the town is famous for a few things:
  • ostriches
  • KKNK
  • Cango caves
  • Jemima's
  • semi-desert climate very unsympathetic towards growing your own fruit and vegetables
It's this last point that forced me to cook out of the supermarket for the few months I lived there. Which is fine if you're happy with your run-of-the-mill everyday food. Not so much if you have boxes of Food & Home to work through. The only exception was pears. For some reason there always seemed to be good pears available, and, as they say, if you can't beat them, join them. I started collecting pear recipes.


I have quite a few good ones, but this one is by far the best. First you make a fabulous cardamom crumble. (And cardamom happens to be my ultimate favourite spice). Then you poach the pears in an orange and spice syrup. Then you caramelise the pears in butter and more sugar. Then you have the pears with the chocolate sauce and crumble. And then you feel like you've died and gone to heaven.


It's the sauce, you see. The pears are delicious, and the crumble is fabulous. Oh, but the sauce. It's the sauce that lifts this recipe into the sublime, all rich and smooth and dark with chocolate. It's the sauce that you end up eating straight from the fridge, mixed with some of the crumble. And that's when you realise this is truly The Best Chocolate Sauce in the World. And then you have just a tiny bit more.


Poached and caramelised crumbly pears
Serves 6

For the crumble

4 cardamom pods
50g oats
50g flour
50g butter, room temperature
50g treacle sugar
50g walnuts, chopped

For the pears

6 firm pears
juice of 1 lemon
150g caramel sugar (I used demerara)
400ml orange juice
100ml sherry or dessert wine
1 stick cinnamon
3 cardamom pods, whole

For the caramel

30ml butter
30ml caramel sugar
60ml of the poaching liquid

Preheat the oven to 180°C
Using a pestle and mortar, crush the cardamom pods and remove the seeds. Discard the pods and grind the seeds. Add this together with the oats to the flour.
Rub the butter into the flour mixture until it looks like coarse breadcrumbs. Add the sugar and walnuts and rub it into the mixture until it becomes lumpy. If you want a finer crumb, combine everything in a food processor.
Sprinkle the mixture onto a baking tray and bake, turning occasionally, until crunchy and golden, about 15 minutes.
Remove from the oven and let cool before use.

Peel the pears, leaving the stalks intact. Brush them with some lemon juice to prevent discoloration.
In a large, heavy-based saucepan, dissolve the sugar in the orange juice and sherry. Add the remaining lemon juice, and the cinnamon stick and whole cardamom pods. Bring slowly to the boil.
Reduce the heat and allow to sauce to simmer for at least 2 minutes to develop the flavours before adding the pears. Poach the pears for about 15-20 minutes, until tender but still firm. Remove from the poaching liquid.

To caramelise the pears, melt the butter in a large, heavy-based saucepan until bubbly. Add the pears and fry for about 5 minutes. Add the caramel sugar and continue turning the pears until they are coated and golden brown in colour. Spoon over some of the poaching liquid, and continue turning until the pears are fully covered in the rich. glossy caramel syrup.

Serve sprinkled with crumble and The Best Chocolate Sauce in the World

The Best Chocolate Sauce in the World

100ml cream
100ml milk
75g treacle sugar
30g butter
50g golden syrup
200g dark chocolate, chopped

Place the cream, milk, sugar, butter and surp in a heavy-based saucepan. Heat gently until the sugar has dissolved, then bring to the boil, stirring occasionally for about 3 minutes.
Remove from the heat and stir in the chocolate.
Continue to stir until all the chocolate has melted.

Enjoy responsibly.

Sunday, February 14, 2010

Chocolate Pizza Pockets

This lady is one of the main reasons I started my own blog. Not only does Meeta have beautiful photo's and delicious recipes, she also hosts the very popular Monthly Mingle. I used to look at the round-ups longing to join in the fun, and am so excited that I can now venture into the world of food blogging events myself. And I couldn't have picked a nicer theme to take the plunge: Bread and Chocolate, hosted by Jamie from Life's a Feast. Wow! The very thought makes my mouth water. And that was even before I'd started having a look around the net for inspiration!


You'd think it an easy choice to make. I love bread. I love chocolate. Combine the two and you have heaven on your plate. Forget the carbs, forget the fat, think about all those anti-oxidants and serotonin, and realise that this is health food. Nay, medicine! You will be downright irresponsible if you don't have bread and chocolate at least once a day! Seriously, I'm all for being healthy and mindful of what you eat, but I do think a big part of that is having whatever your body tells you it needs, have it in moderation, and enjoy eating it. All this guilt about the food we eat cannot possibly be good for our health!

Anyway, back to recipes. My, oh my, what a selection. Chocolate on bread with a sprinkle of sea salt, chocolate bread and butter pudding in any conceivable variation, chocolate chip bread, good old Nutella on toast, and chocolate hot cross buns, (yes, I know it's only February, but why we restrict ourselves to these fabulous buns only at Easter is beyond me). Where to start?

After lots of hmming and aahming, I decided to go back to my current philosophy, which is to love my money. I know it sounds strange, but I'm reckoning that if you love your money, you will only exchange it for something really really worthwhile, which in my case means I don't go to the shops all the time and spend it on crap. It also means only one grocery trip a week, based on a carefully planned menu, and some lateral thinking when it comes to using what you have first. And what I try to have around these days is either a batch of my favourite new pizza dough, or the ingredients to whip some up. I love this pizza dough - it can be used for so much more than just pizza, (which is great by itself, let's face it), and I am working on few ideas which I'll tell you all about later.

What I also have in my cupboard at all times is some good chocolate. Green & Black's to be exact. Please allow me to digress for a minute. I have a wonderful, lovely girlfriend who lives in Johannesburg, called Anelle. Not only is she smart and funny and generally great company, she is also the best giver of gifts I know. She always has something to give, and it's always chosen with care and fabulous taste. One of the gifts I've received from her was a block of this wonderful chocolate, and I've been eating it ever since. (Not that particular block, mind you, that was gone in a matter of minutes). The dark chocolate is rich and smooth, the milk chocolate is not too sweet, and the white chocolate has vanilla in it! Hence, always a special place in my cupboard for this trio.


I wanted to do something different than just your average chocolate pizza, and decided to make little pizza pockets, one half of the batch filled with a spicy dark chocolate and hazelnut mix (thank you Cooksister for the great idea!), and the other half with white chocolate and macadamia nuts.


I started off with little pockets more or less the size of ravioli, but there wasn't enough filling to stand up to the amount of dough. For the next round I cut rounds of about 10cm diameter, placed the filling on one side, then folded them over and squeezed the edges together. This worked much better. I also added a little splash of cream to the white chocolate mix, as it was a tad dry with only the chocolate and the nuts. Next time I will use some white chocolate spread instead of the cream for a nice smooth filling, and I will also add some cardamom for some extra oomph.

These little chocolate pockets turned out really delicious, and I'm really proud of them. I hope you like them too if you decide to make them, or use them as inspiration for your own recipe.


And of course, I hope your Valentine's day is full of love, friendship, and some chocolate.

Chocolate Pizza Pockets

One quantity of my pizza dough, or use your own favourite recipe

For the white chocolate filling

about 1/2 cup of white chocolate spread
100g white chocolate, chopped
50g macadamia nuts
1/2 teaspoon ground cardamom

For the dark chocolate filling

100g dark chocolate, chopped
about 1/2 cup of Nutella
50g hazelnuts, chopped
1/2 teaspoon ground cinnamon
1/2 teaspoon ground chilli (if your tastebuds agree)


Preheat oven to 200°C/400°F

Roll out your pizza dough as thin as you can. Cut out circles of around 10cm diameter.

For the white chocolate pockets: place a dollop of white chocolate spread towards one side of the circle, top with some white chocolate, macadamia nuts and a pinch of cardamom. Fold over the other half of the dough and pinch edges closed.

For the dark chocolate pockets: place a dollop of Nutella towards one side of the circle, top with dark chocolate, hazelnuts, a pinch of cinnamon and a pinch of chilli. Fold over the other half of the dough and pinch the edges closed.

Brush the tops of the pockets with some egg for some colour.

Bake for 12-15 minutes until golden brown.


Saturday, February 13, 2010

I Heart Koeksisters

You know how sometimes you come up with a really, really fabulous idea, and get all excited about it, then realise that somebody else already thought of it? When we got married, the Fabulous Man thought that it will be really special if we send our rings around the guests during the ceremony, so that everybody can bestow their good wishes on it. We discussed this with our celebrant, who said "Oh yes. A ring blessing ceremony." Turns out the custom has been around for ages and everybody's doing it. Everybody except those whose weddings we've been to, it seems. We still did it, and it was still special, but it would've been just that tiny bit more special if we were the couple who introduced this custom to the world.


Same with this koeksister recipe. Wouldn't it be nice to come up with a recipe for Valentines day which is quintessentially South African, but with a lovely romantic twist of my own, I thought. Like koeksisters. And different shaped ones. Maybe hearts instead of  the traditional plaited ones? Then, as I browsed the Sarie website, I came across these. Now, I realise they are round, not heart shaped, but still. I will never be able to say the alternative koeksister shape was my idea.


So let's just pretend we never saw these, and get all excited about my version. Have I mentioned that they're heart shaped? For Valentine's day? I also flavoured the syrup with rose water, cardamom and some cinnamon for a romantic twist, but you can keep it plain, by all means. You can also ignore the whole fabulous heart shape idea and plait your dough after cutting it into strips. Or do any shape you want, for that matter.

If you're not a South African, please visit the aptly named Cooksister, where Jeanne did a wonderful post on koeksisters here, for a thorough introduction. This recipe is the based on the above mentioned Sarie one, which I've translated here.


Valentines day koeksisters
Makes about 10

Syrup
The syrup needs to be thoroughly chilled.

1 kg sugar
500 ml water
2 ml cream of tartar
1 cinnamon stick
3 cardamom pods, cracked
5 ml rose water, or to taste

Place all the ingredients in a saucepan, and bring to a boil while stirring. Cover with a lid, and let boil for one minute. Uncover, and boil for 4 more minutes. Remove from stove and let it cool. Keep in the fridge until needed.

Dough

240g (500 ml) flour
1 ml salt
10 ml baking powder
40 ml butter
1 egg
10 ml sugar
100 ml cold water
oil for deep frying

Sift together the flour, salt and baking powder. Rub the butter into the flour until it resembles crumbs.

Beat together the sugar, egg and water. Add to the dry ingredients, and mix until a soft dough forms. Cover and let rest in the fridge for at least 30 min.

Roll out the dough to 1 cm thick, and cut out your desired shapes. Cover until needed.

Heat the oil, and deep fry the koeksisters until golden brown. (I used some of the dough scraps to test the temperature of the oil)


Remove with a slotted spoon, and plunge into the ice cold syrup for about 1 minute, until the koeksisters are saturated.
 
Let  cool on a wire rack over some baking paper to drain excess syrup.

Enjoy ice cold.


Tuesday, February 9, 2010

This ain't no no-knead pizza

I first heard about Jim Lahey's no-knead bread recipe through the lovely Luisa from Wednesday Chef, and was intrigued by the whole business: fermenting water, shaggy dough, crackling bread! I read as much as I could, and it seemed as if every blogger worth his/her salt made this with showstopping success and loved every minute of it. The recipe was copied and saved and added to my to-bake list.

And that's where it still is. You know why? It's the waiting bit. First it's 12 hours (but preferably 18). Then wait another 2 hours. Then bake for 30 minutes at a temperature which will probably ruin your fabulous new castiron pot's handle. And it's 3 days later before you get to enjoy this wonderful bread. Now, I think it's time for me to play the baby card. Just reading about all this waiting around, and thinking about how I'm going to fit it in between feeding a baby, playing with a baby, trying to get a baby to go to sleep, changing a baby, and have I mentioned feeding a baby?, and I'm exhausted enough to abandon the recipe for some unforseen future date, probably when Little Girl is in her teens.


Also, and probably more importantly, there's the no-kneading bit, which I realise is necessary as it's part of the name and everything, but the more I think about it, the more I have to admit that I actually like kneading. I like how the dough is all gooey and sticky and messes up your rings (and I ALWAYS forget to take off my rings), but the more you push and fold and push and fold, the silkier it gets, until you're left with a smooth mound of soft white springy dough. I find it therapeutic, much the same as stirring risotto.

Then, to top it all, I found a recipe that doesn't include waiting. That's right. You turn on the oven, mix you dough, knead it for about 10 blissfull minutes, by which time your oven and pizza stone is nice and hot, and you can do a quick assembly and ta-da! Pizza in the oven. Also, if you don't want two huge pizzas, which this recipe makes, you can freeze half of it, ready for those evenings when you're tired and hungry and couldn't be bothered to make something fancier. Oh, be still my fluttering heart!


Not that I have abandoned all hope of ever making Mr. Lahey's masterpiece. It's still on the to-bake list, and it still sounds intriguing. One day I'll get around to it, and see what all the fuss is about. I might even ignore the fact that thousands of bloggers before me has done the same, and write and tell you all about it.

Pizza
makes 2 large pizzas

2 cups flour (this is where all bloggers start to discuss the virtues of different types of flour. I'm still new and stupid, so let's say plain)
8g sachet instant yeast
pinch of caster sugar
2 tablespoons olive oil
3/4 cup warm water

Preheat the oven to 200°C.

Sift flour into a bowl. Add the rest of the ingredients, and a pinch of salt, and mix until the dough comes together.

On a floured benchtop, knead the dough until elastic and springy, about 10 minutes. Divide into halves, roll out.

Add your toppings, and bake for 15-20 minutes, or until the crust is golden brown.

                                                              oOo

You might notice the absence of a photo of the finished pizza. That is because the  Little Girl demanded a drink the moment the pizza went into the oven, and I lost track of time. Fabulous Man was on the phone, so nobody was looking out for dinner. In short, it burnt. Not a lot. It was very delicious after we cut off the burnt edges, but still not good enough to take a photo of. Instead, please accept a photo of an original piece of artwork of mine, called Flower. I know it will make up for it.

Sunday, February 7, 2010

Good morning, welcome, have some pudding


Hallo! After spending many months and far too many hours reading about fabulous food, looking at beautiful photos, and meeting lovely new people, I've decided that this is something I'd like to get more involved with. Mind you, not that I'm particularly good at writing, or photography, or cooking, for that matter. In short, this blog will probably turn out to be one of those "What was I thinking?!" ideas in my life. However, I thought about it a bit, then some more, wrote down a few phrases, and here we are.

Let me introduce myself. My name is Adele, and I am a South African living in the mountains just outside Melbourne, Australia. I am married to my wonderful Australian husband, aka the Fabulous Man. We have a 6 month old baby girl, who is the cleverest and most beautiful baby ever born. All my family is back in South Africa, and I miss them terribly, but I have the most wonderful family-in-law a girl could ask for, so I don't feel like an orphan. Not much, anyway.

Even though my mother tongue is Afrikaans, I will write in English to make this blog more accessible. Please feel free to comment in any language, however, if it's in a language other than Afrikaans, English or French, I won't understand you. Sorry about that.

"What's up with the name?", I hear you ask. For all our non-South African readers, a brief explanation. Biltong is probably South Africa's most popular export after Charlize Theron. Air-dried, spiced meat, mostly beef, but also made with other meat like kudu, impala, or ostrich. You often hear it likened to jerky, but don't be fooled. It's nothing like it. Think prosciutto, only much, much better. Listen to any group of South African expats talking, and you'll notice the conversation soon turn to where the best local supply of the good stuff is.

However, for some inexplicable reason, it's not that popular among our international friends. I'm yet to meet the Aussie who doesn't smile weakly while they're politely chewing, making vague yummy noises, then ignoring the biltong in favour of the nachos for the rest of the evening. There must be a biltong gene.

Now, I know you are expecting a recipe featuring biltong. Some other time, I promise. For my first entry I've decided to make a popular South African dessert with that other wonderful South African export, Amarula (so wonderful, in fact, that it deserves it's own post at a later stage). I always prefer sweet over savoury, and a baked pudding is my idea of food heaven. This one is covered with a sweet creamy sauce, with some Amarula in my version, and baked in little souffle dishes. You can make it in a big dish, but I bought my souffle dishes a couple of years ago, used it once, and only rediscovered them when we moved to our new house last year. As we're in a recession, my contribution will be to use my dessert dishes more then once. So there you go. Do what you must.

The recipes floating around the internet for Amarula malva pudding are variations on this, combining Amarula and cream which you serve with your normal mava pudding . I wanted the Amarula to be part of the pudding itself, and used some of it in the sauce. I came across a recipe for malva puddings in the current Food & Home Entertaining, which asks for the sauce to be poured over the pudding right at the start, and then again 30 minutes into the cooking time. I did this with half of my puddings to see if I liked it. The tops of these puddings were all nice and sticky and caramelised, and I will be making it this way from now on.


In the end I didn't have cream at all, but I have to warn you that it is the first thing the Fabulous Man asked for when handed his dessert. Maybe have some cream on hand if you like it, or in case our husbands have the same taste in puddings.

Individual Amarula malva puddings
Serves 6

Sauce
150ml evaporated milk
100ml Amarula (or use Bailey's if you can't find Amarula. Or all evaporated milk)
100g unsalted butter
100g soft brown sugar
60ml hot water

Pudding
250g sugar
15g butter
1 egg
60ml smooth apricot jam
250g self-raising flour
salt
5ml bicarbonate of soda
1 cup milk
10ml vinegar (I only had balsamic, which worked fine)
10ml vanilla extract

Preheat the oven to 180°C.

Butter 6 individual ramekins, or one big dish.

Combine all the sauce ingredients in a saucepan and heat. Continue stirring until the sugar is dissolved, and the sauce starts to caramelise. Remove from heat and keep warm.

Beat together the butter and the sugar for the pudding until smooth and fluffy. Add the egg and the apricot jam, and beat until pale.

Sift together the flour, bicarbonate of soda and the salt.

Combine the milk, vinegar and vanilla extract.

Alternately beat the flour mixture and the milk  into the egg mixture until combined.

Pour the batter into the moulds, cover with hallf the sauce and bake fot 30min. (Alternatively keep the sauce separate and pour everything over the puddings when done)

Remove from the oven and pour over the remaining sauce. Continue to bake until the centres of the puddings are firm, about 15min more.

Serve with cream.